Setting Up Your Development Environment
Learning Content
Last updated: February 24, 2026
Setting Up Your Development Environment
Before you start building Lightning Web Components, you need to set up your development environment. The following steps will guide you through installing the necessary tools.
Installing Salesforce CLI
Salesforce CLI (Command Line Interface) is a powerful tool that helps developers interact with their Salesforce org, push and pull metadata, and manage deployments.
- Download the Salesforce CLI from Salesforce Developer Website.
- Install the CLI based on your OS:
- Windows: Run the
.exeinstaller. - Mac: Use Homebrew (
brew install sfdx). - Linux: Use
.tar.gzpackage and extract it. - Verify the installation: Open a terminal/command prompt and run:
I highly recommend you to follow the steps from salesforce’s official document. click here.
sfdx --version
This should return the installed version number.
Setting Up Visual Studio Code
Visual Studio Code (VS Code) is the recommended code editor for LWC development. It provides powerful extensions and debugging tools for working with Salesforce.
Steps to Set Up VS Code:
- Download and install VS Code from Visual Studio Code Website.
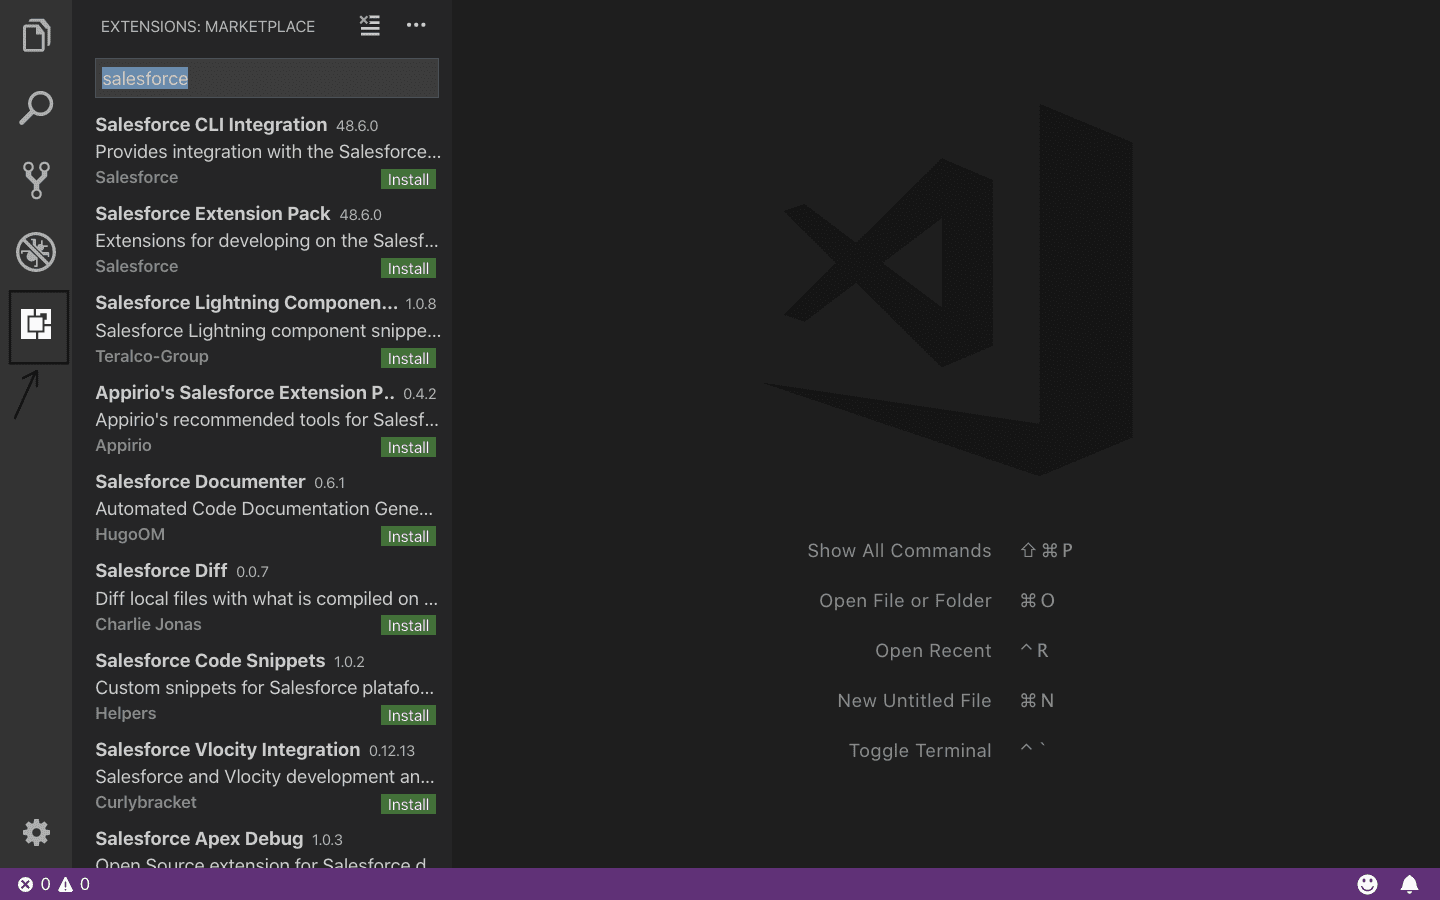
- Install the Salesforce Extension Pack from the VS Code marketplace.
- Click on the symbol
Extensionshown in the below image. - Type
Salesforce extension packin search box and click install as shown in below image. - Open VS Code and ensure that the Salesforce CLI is recognized by running:
- (Optional) Install Prettier and ESLint extensions for better code formatting.
sfdx --version
Creating a Salesforce DX Project
Once you have Salesforce CLI and VS Code set up, you can create your first Salesforce DX project.
- Open VS Code and launch the terminal (
Ctrl + ~on Windows,Cmd + ~on Mac). - Run the following command to create a new Salesforce DX project:
- Replace
myLWCProjectwith your desired project name. - Navigate to the newly created project folder:
- Authorize your Salesforce org (login required):
- This will open a browser window for you to log in to your Salesforce org.
- Once logged in, the CLI will store your authentication details.
- Set the default org for your project:
- Replace
yourOrgAliaswith a meaningful name for your org.
sfdx force:project:create -n myLWCProject
cd myLWCProject
sfdx auth:web:login
sfdx force:config:set defaultusername=yourOrgAlias
Now, your development environment is ready! You can start building Lightning Web Components inside your Salesforce DX project.
Practice What You've Learned
Test your understanding with these practice exercises


