Creating Project, DevHub and Scratch Org – Lightning Web Components
Objective
A. Create a SalesforceDX Project
B. Create a DevHub Org
C. Create a Scratch Org
D. Get to know about some basic commands
In this unit, We will be creating a project, DevHub Org and scratch org.
A) Create SalesforceDX Project
1. Open VSCode. Press CTRL+SHIFT+P(Windows or Linux), Command+Shift+P (Mac).
2. Here type SFDX:Create Project with Manifest
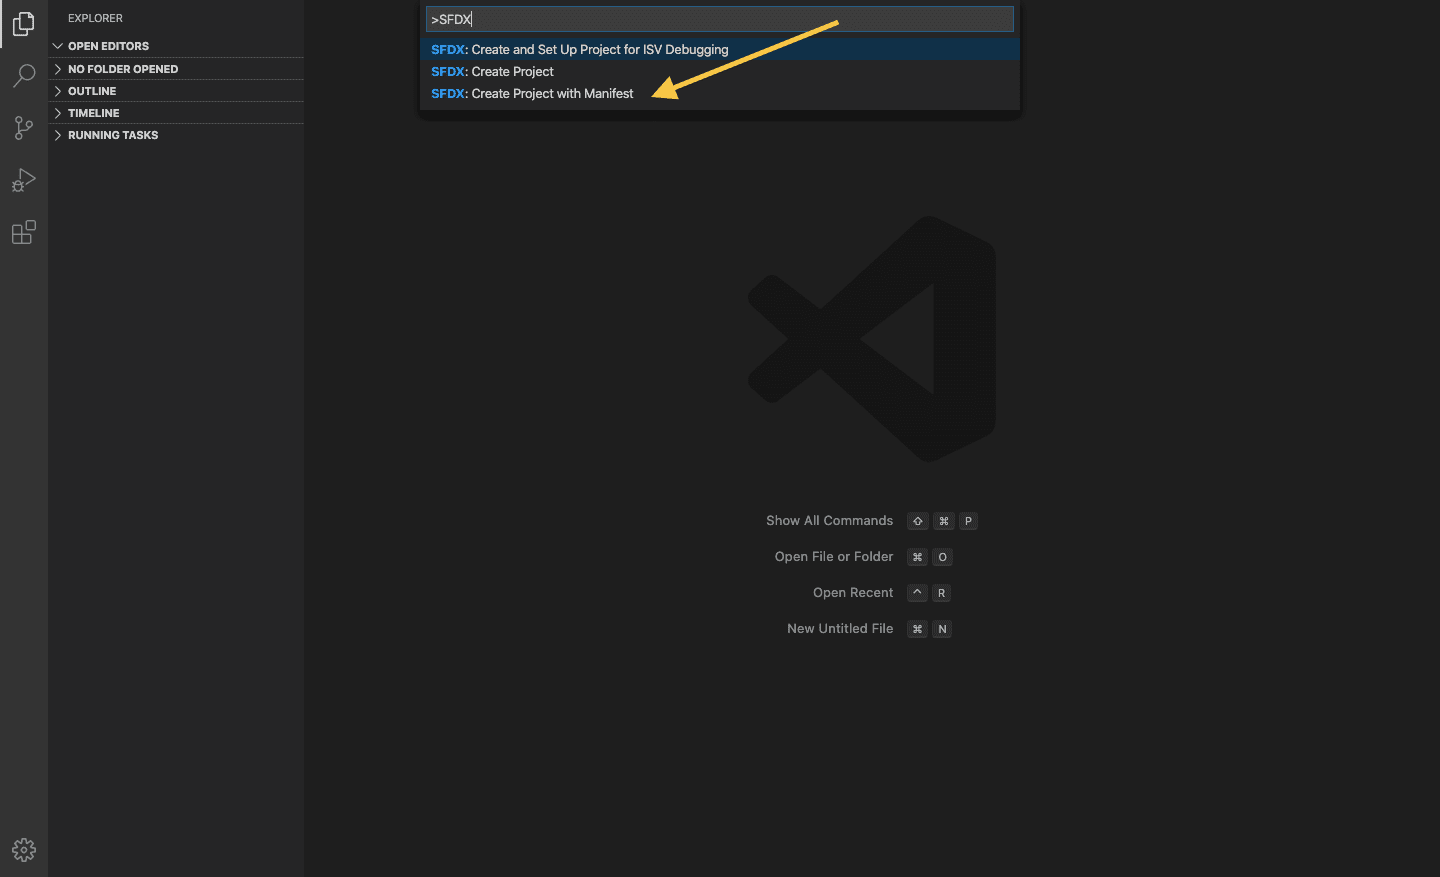
If you do not see the option ('Create Project with Manifest'), you might try restarting your IDE or verify if all
per-requisites are met.
![]() MIND IT !
MIND IT !
what is the difference between Create Project and Create Project using Manifest?
Create Project is an empty project with only the folders.
1. Choose an existing folder for your project on disk
2. Open VSCode. Press CTRL+SHIFT+P (Windows or Linux), Command+Shift+P (Mac).
3. Here type SFDX: Authorize an Org
4. Enter an alias of this org (here MYFIRSTAPP)
5. Enter your credentials (user/password)
6. Terminal (tab): type the next command lines directly
sfdx force:source:retrieve -m ApexClasssfdx force:source:retrieve -m AuraDefinitionBundleCreate Project using Manifest => "manifest" folder contains a default package.xml
1. Choose an existing folder for your project on disk
2. Open VSCode. Press CTRL+SHIFT+P (Windows or Linux), Command+Shift+P (Mac).
3. Here type SFDX: Authorize an Org
4. Enter an alias of this org (here MYFIRSTAPP)
5. Enter your credentials (user/password)
6. Right click on package.xml
7. SFDX: Retrieve Source in Manifest from Org
3. Enter as the project name and press enter
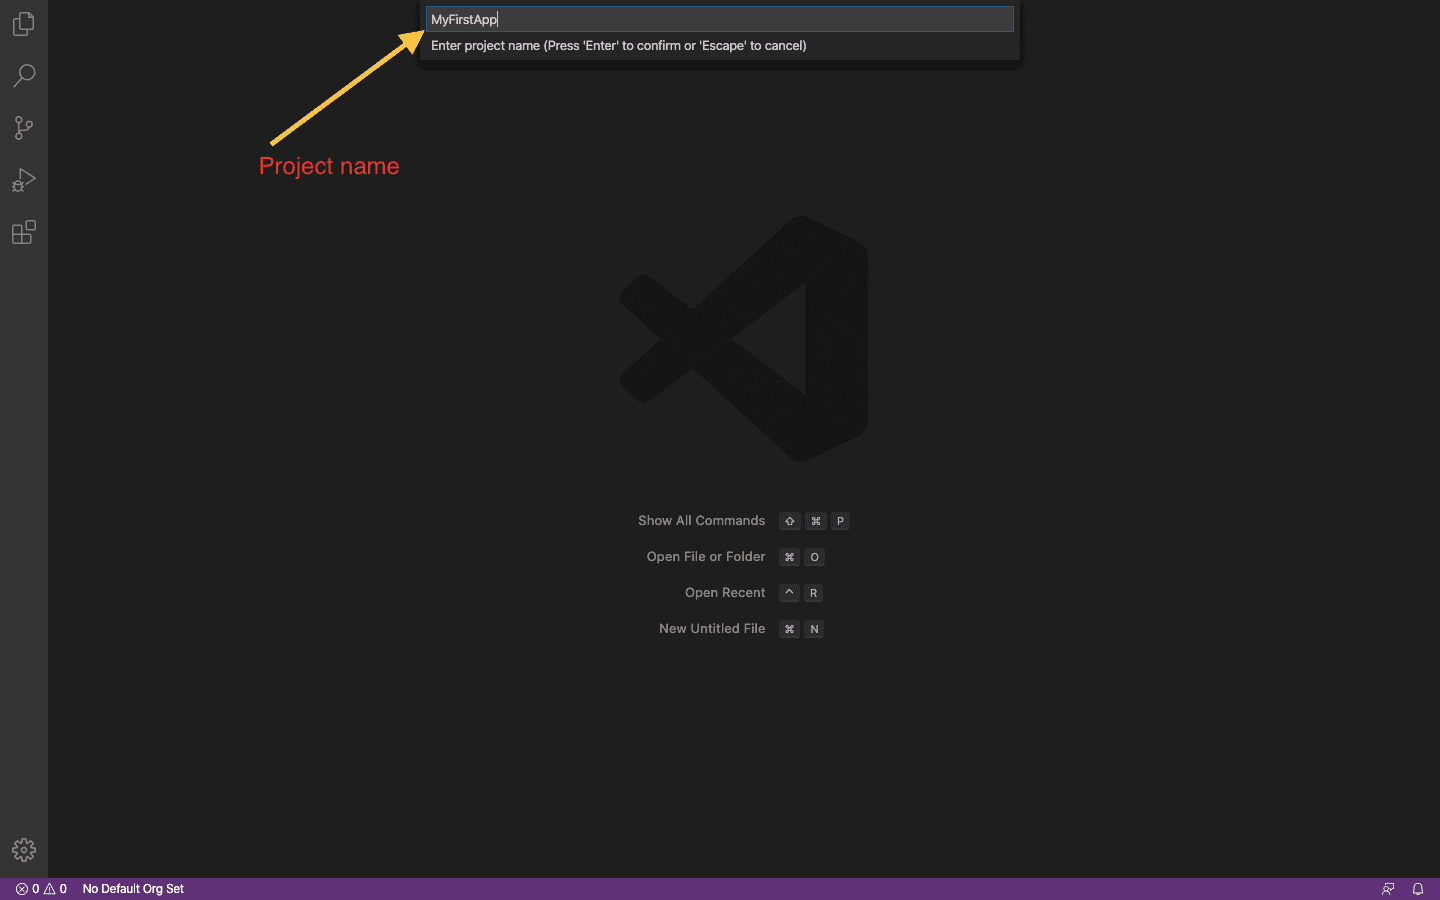
4. After giving the name, It will ask you to save your project in the folder. Specify the folder here. ( I would suggest you to first create a folder name lwc and store the project in this folder. as we will be wiring more session examples here.)
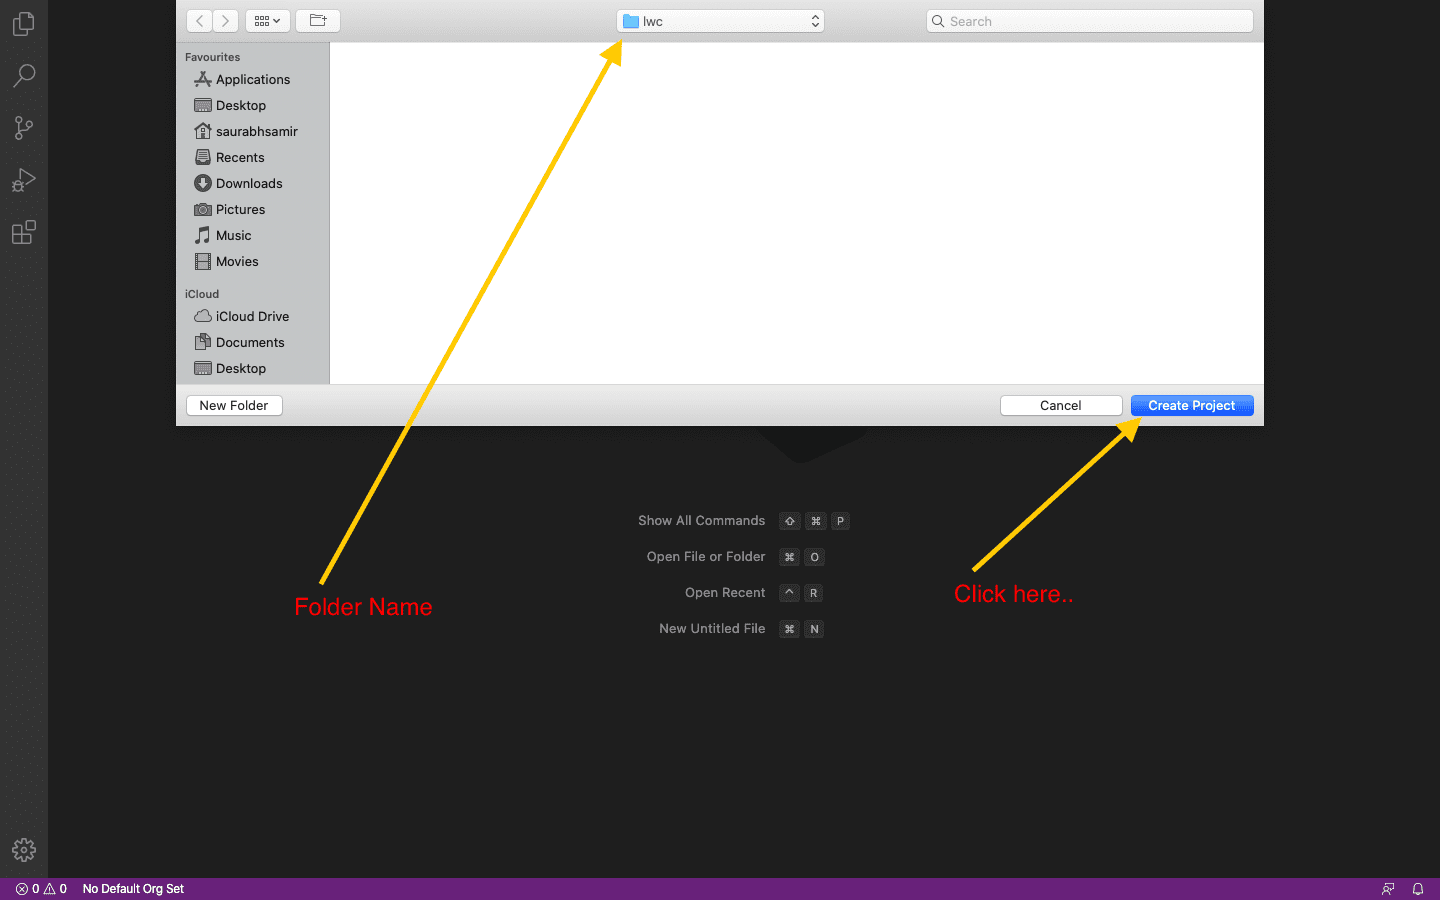
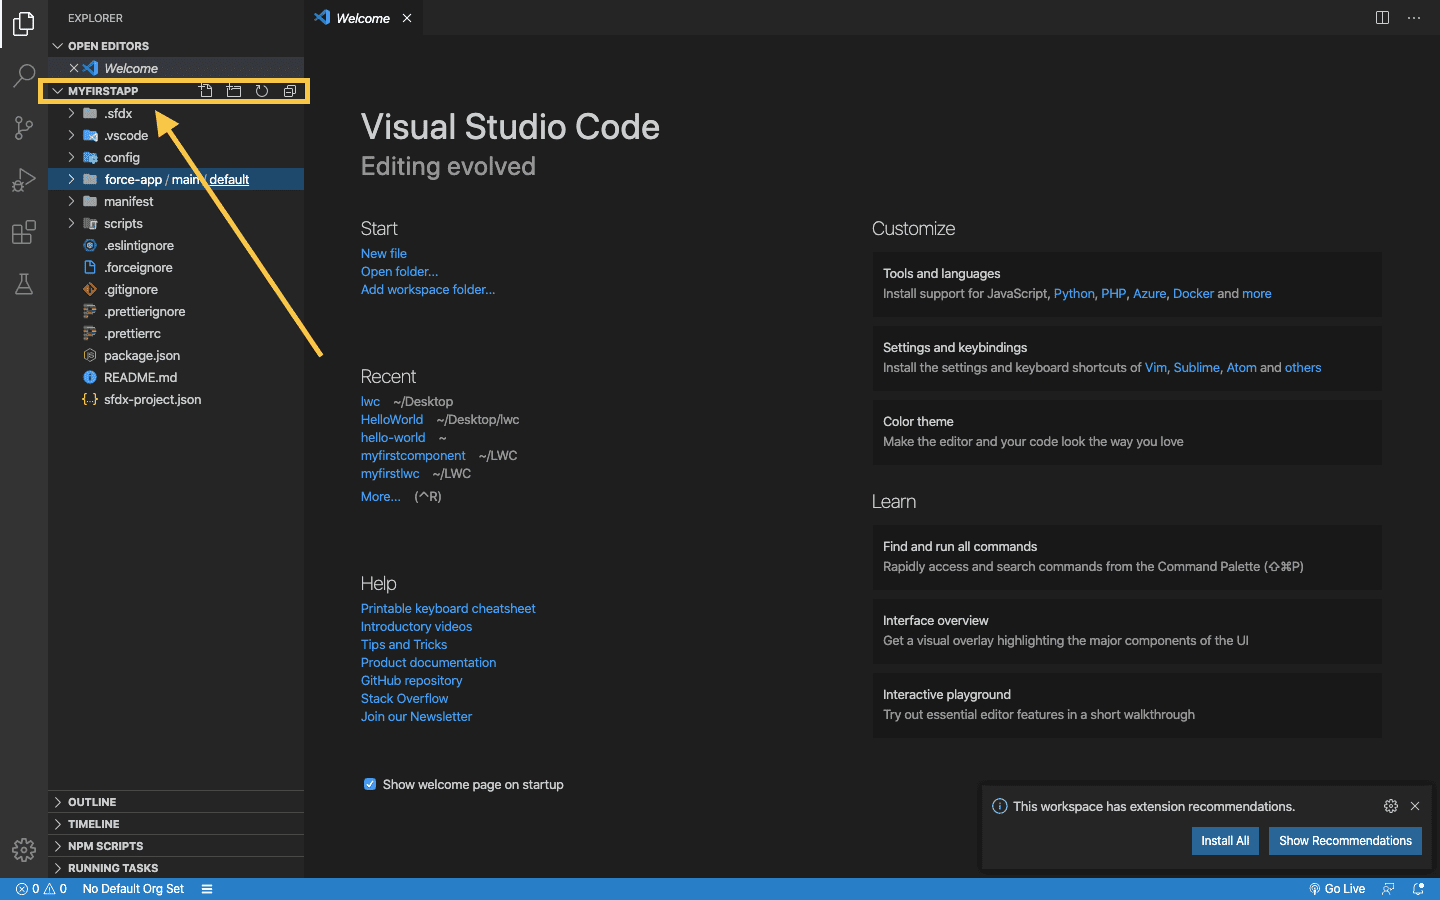
5. Click on the Create Project button. Now you can see the folder hierarchy.
B) Create a Dev Hub Org
1. First signup for a pre-release org. Goto here: https://www.salesforce.com/form/signup/prerelease-summer20/
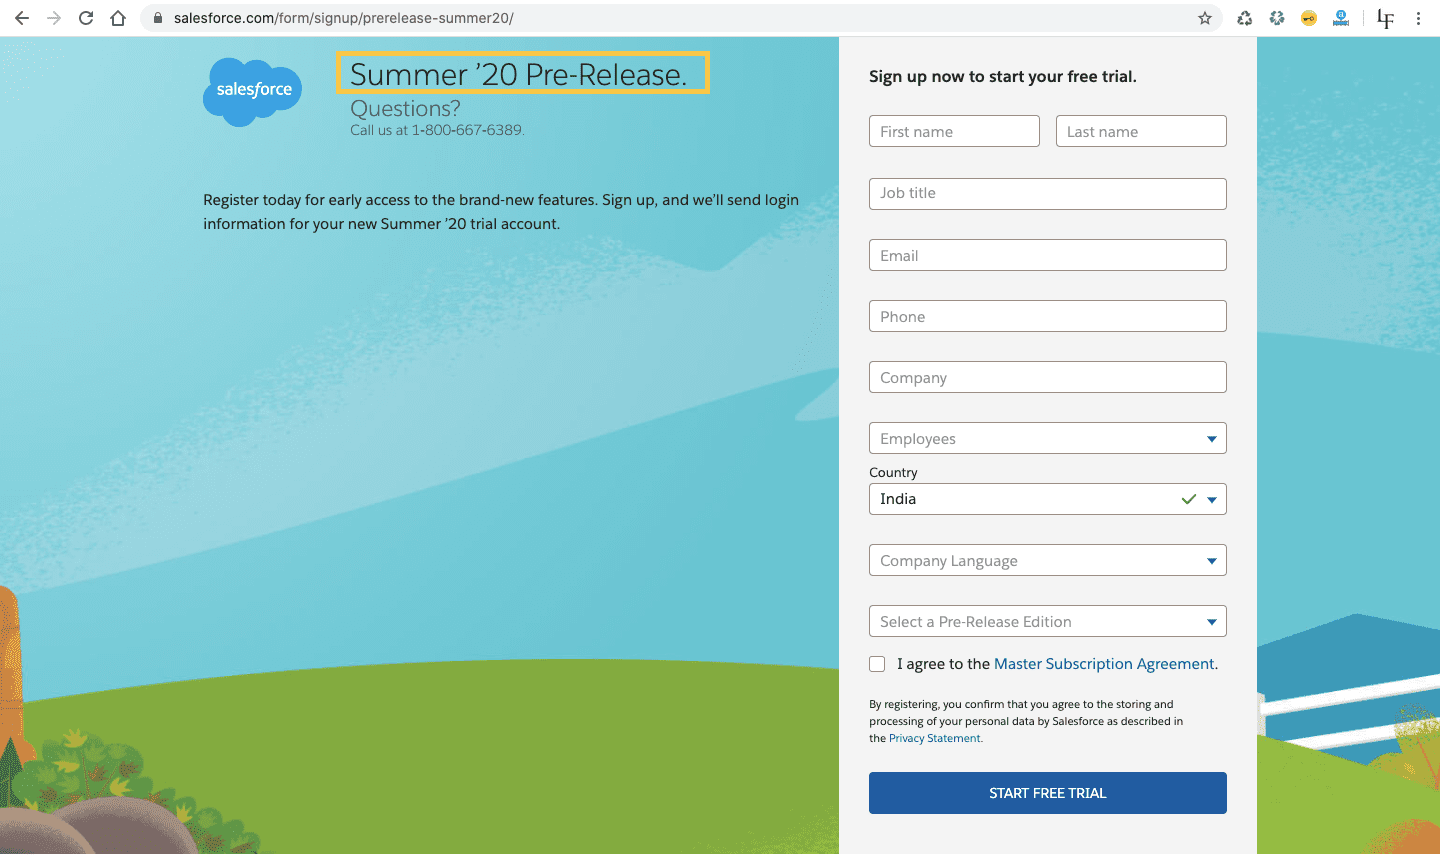
2. After creating the org, You will receive an email to activate your org and password setup.
3. Enter the login id and password.
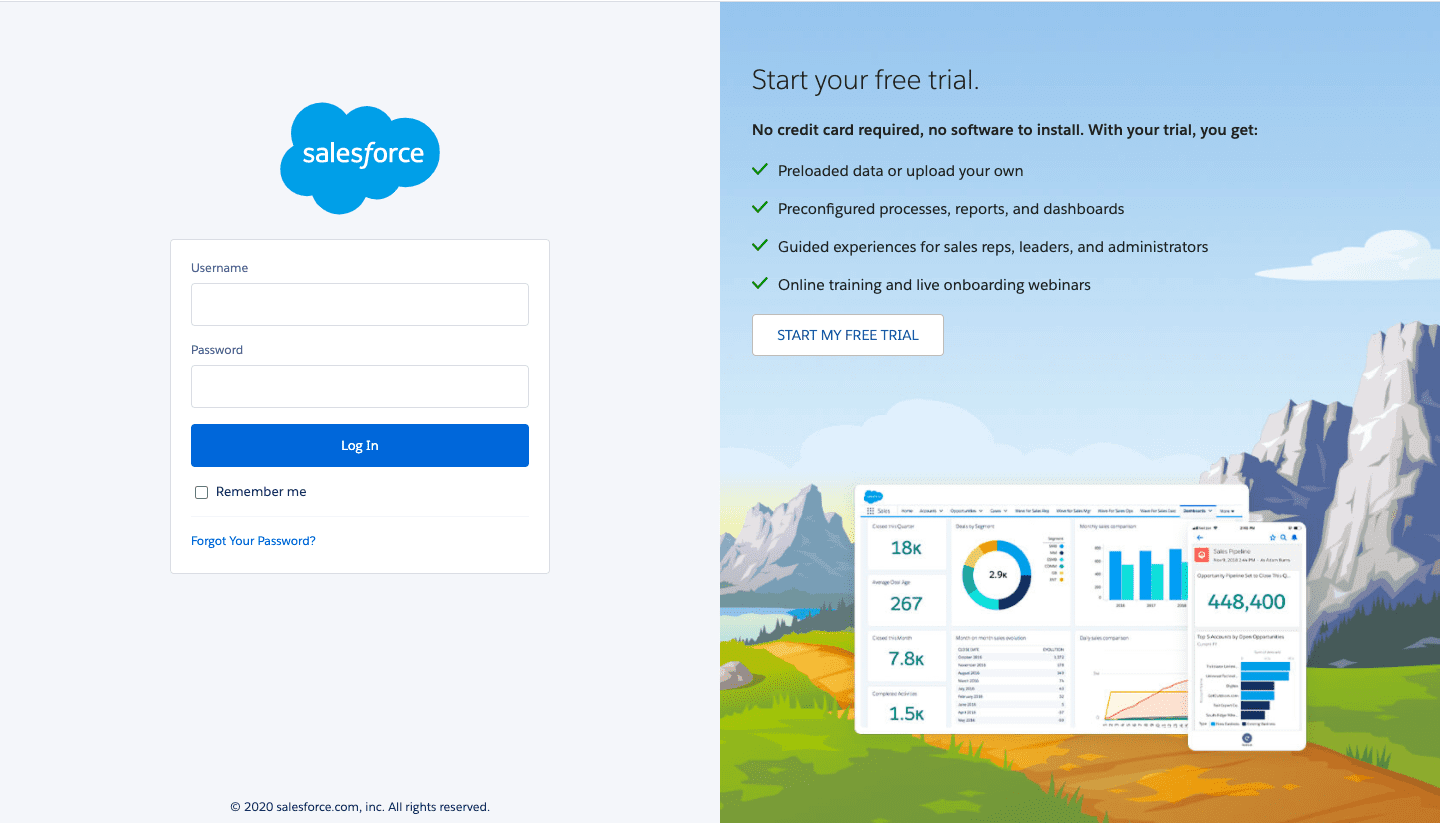
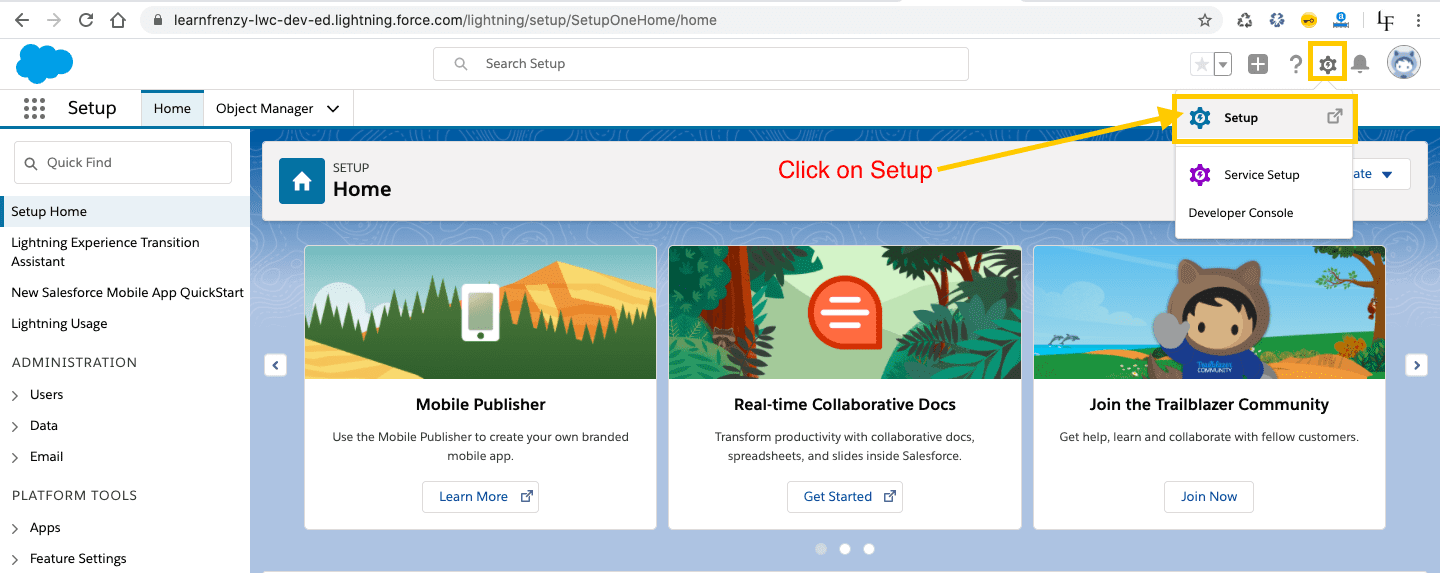
4. After successful login, Goto Setup(Top-Right).
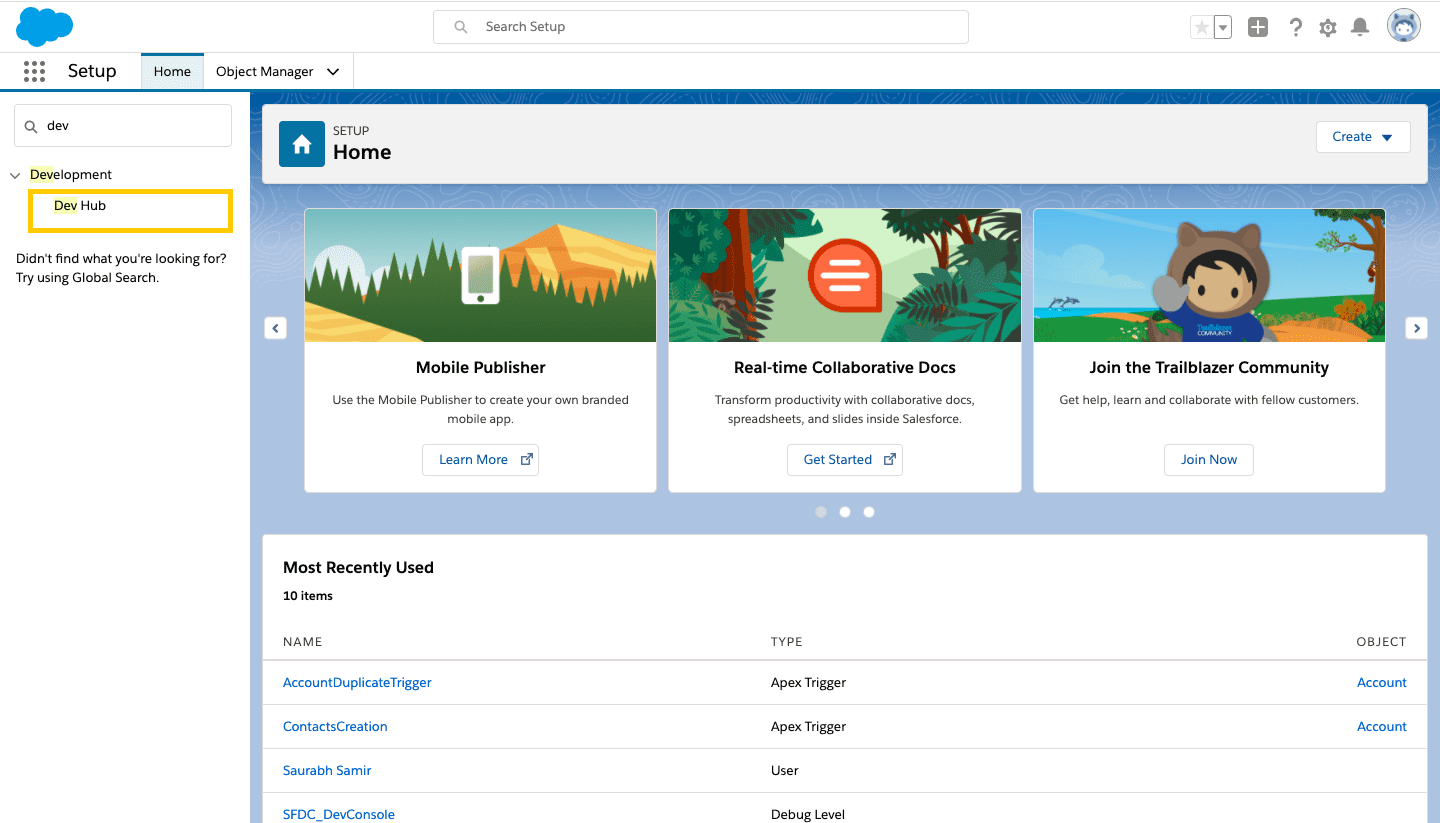
5. Here search for Dev Hub in the sidebar.
-> Quick Find Search Box --> Enter Dev Hub
6. To create a scratch org we need to enable a dev hub as shown in the below images.
-> Here enable the DevHub feature.
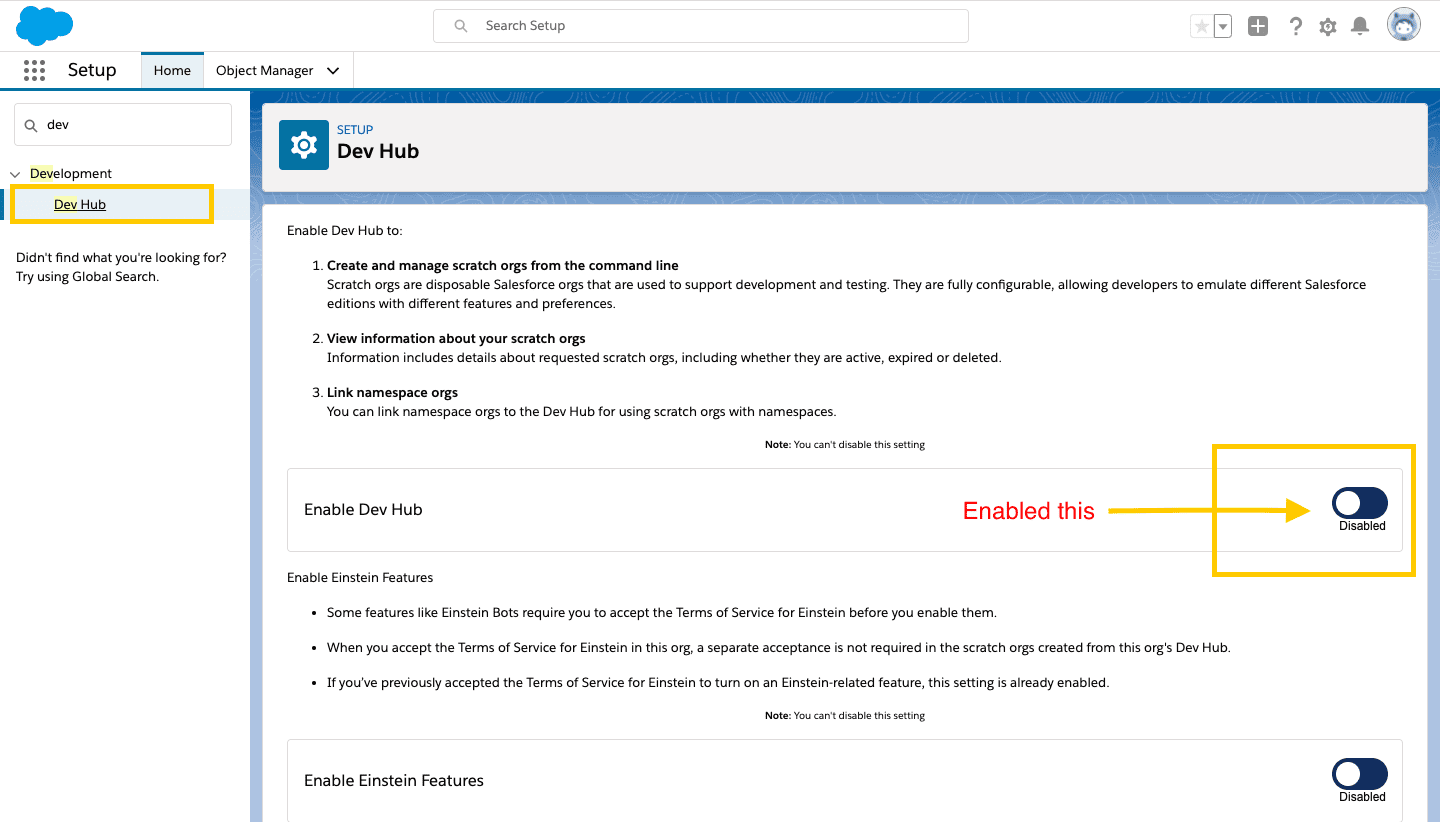
7. These are the two new objects which are created after we enabled dev hub in our org as shown below.

Till now, You have an Org. Now we need to connect this to our IDE.
8. Open VSCode. Create a project.
9. Goto VS code. Press Ctrl+Shift+P(Windows),
Command+Shift+P (Mac)
10. Here type SFDX: Authorize a Dev Hub.

11. It will open the login page in the browser. Here enter detail of the org that you have created above and do the login.
12. Go back to Visual Code Studio where we can see the status of authorization as shown below.
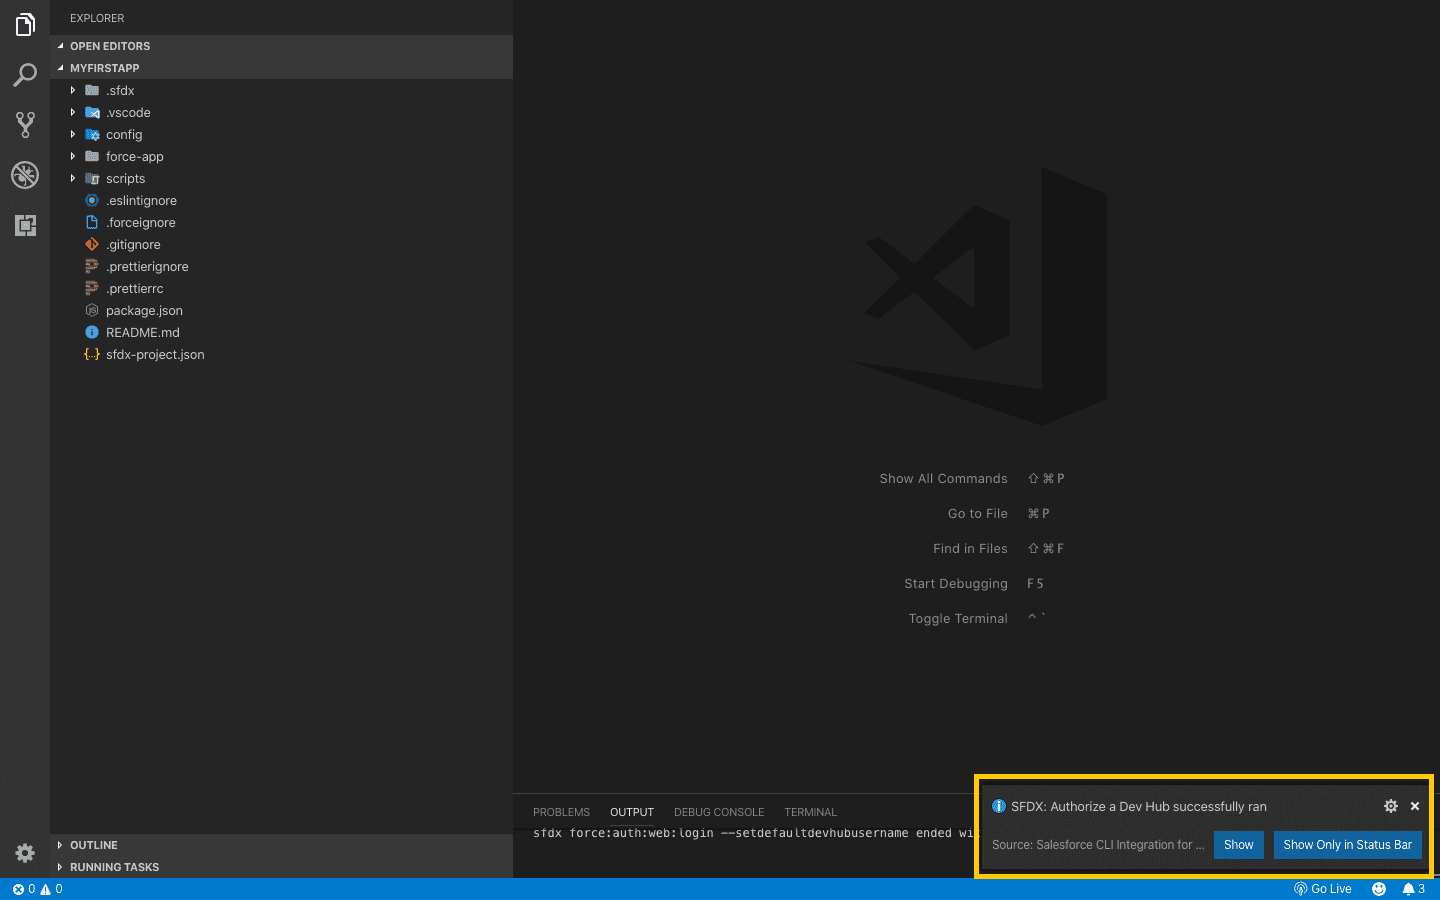
Cool, You have authorized your dev hub.
C) Create a Scratch Org
1. Again, Goto the VS Code and Press Ctrl+Shift+P (Windows), Command+Shift+P (Mac)
2. Here type SFDX: Create a Default Scratch Org.
3. Just hit the enter. Now provide the scratch org name. ( You can give LWCProjectScratch)
4. Wait for a few minutes, Salesforce will create a new org for you. All of the development will go here.
D) Commands that you should know:
1. Open your scratch org by the following command.
sfdx force:org:open2. You can see all of your org lists by the following command:
sfdx force:org:list3. Push your code to scrap org:
sfdx force:source:push