Top 30 Salesforce CPQ Interview Questions & Answers
Thirty Salesforce CPQ interview questions with answers — quote-to-cash, products, bundles, price rules, product rules, approvals and contracts.
Fifty-plus Salesforce Lightning interview questions with answers — Aura components, LWC, events, Lightning Data Service, security and performance.

Lightning (Salesforce Lightning) is a component-based framework for app development from Salesforce.com that is designed to simplify processes for business users, who typically do not have programming experience.
The Lightning platform allows its users to quickly create and customize applications with drag-and-drop components. By quickly delivering customized and connected applications, your sales, marketing and service teams work more effectively to collaborate and make customers happy.
Lightning Components is a UI framework used to develop web applications for mobile and desktop devices. Our developers use the Lightning Component Framework to create single-page applications with a dynamic and responsive user interface for Lightning platform applications, using the functionality of JavaScript and Apex.
In this blog series, I have tried to cover most of the questions that are frequently asked to a Salesforce Developer in an interview on Salesforce Lightning.
Lightning Component Framework
Aura Framework
• Aura Framework is design by Salesforce which is open source framework for creating ui components. Available since 1995. Give us ability to create components in 'separation of concerns' fashion. All parts of the component can be developed independently and combined later.
Lightning app builder is used to create lightning pages for Salesforce Lightning experience and mobile apps.The Lightning App Builder is a point-and-click tool.Lightning Pages are built using Lightning components which are compact, configurable, and reusable elements that you can drag and drop into regions of the page in the Lightning App Builder.
We can create different types of pages using lightning app builder :
1) App Page
2) Home Page
3) Record Page
Lightning component is a component based framework. It is based on event-driven architecture which allows to communicate between different events.
Lightning events are fired from JavaScript controller actions that are triggered by a user interacting with the user interface.

It can called as a MVCC framework which has two controller, one is client side and other is server side.
A component bundle contains a component or an app and all its related resources.
Lightning Bundle basically, a collaborative name of the following files:
 Lightning Bundle
When you build lightning component you deal with the following component bundles:
 Component: Components are the self-contained and reusable units of an app. File where UI is represented. Showcase stuff contained. Primary file in the resource bundle.
A component can contain other components, as well as HTML, CSS, JavaScript, or any other Web-enabled code. This enables you to build apps with sophisticated UIs.
 Controller JS: This is a client-side Controller. A client-side controller handles events within a component. It’s a JavaScript resource that defines the functions for all of the component’s actions.
It is auto-wired via the naming convention, <ComponentName>Controller.js like: MyFirstAppController.js here MyFirstApp is Component Name.
Each action function takes in three parameters i.e. Component, Event, and Helper.
In the controller we can call function directly from action of component like: {!c.myAction }. We can calls helper function from controller function with helper keyword.
Example
MyFirstApp.cmp : This is Component of MyFirstApp Bundle
<aura:component>
    <ui:button label="My Action" press="{!c.myAction}"/>
</aura:component>
MyFirstAppController.js : This is Component Controller of MyFirstApp Component Bundle
({
    myAction : function(component, event, helper) {
        alert("This is my Controller function");
    },
})
Note : we can’t call controller’s function or recursion function itself.
 Helper JS: A JavaScript file. Code of controller can be shifted to this file. Helps in making the controller easier to load in the browser. This is called lazy loading design pattern. Heavy code outside that is only invoked when called. This is a best practice method.
It is auto-wired via the naming convention,
A JavaScript callback function is invoked when the Apex method completes. The JavaScript callback function evaluates logic and updates the component’s UI.
Example
From above example we need to add some statement i.e.
myFirstAppController.js : This is Component Controller of myFirstApp Component Bundle
({
    myAction : function(component, event, helper) {
        //Calling helper function
        helper.myActionHelper(component);
    },
})
myFirstAppHepler.js : This is Component Helper of myFirstApp Component Bundle
({

    myActionHelper : function(component, event, helper) {
        alert("This is my Helper function");
    },
})
If we want to reuse function in the component put it into helper. Hepler we can call helper’s function or recursion function itself.
Note : we cannot call Helper’s function directly from action of component like: {!c.myAction}
 Style File: A CSS file. Helps in applying unique style for the component. Stylesheets can be applied in 3 different ways - Inline, Internal and External.
Documentation: Helps us create a predefined documentation for all the components that are being developed. This is a best practice.
Renderer: Renderer is client-side Controller. It’s a JavaScript resource that defines the functions for all of the component’s actions. When the component is launching in the browser, if we want to implement a different functionality or behaviour at runtime, we use this.
Example
myFirstAppRenderer.js : This is Component Renderer of myFirstApp Component Bundle
({
    render : function(component, helper) {
        var ret = this.superRender();
        //Calling Helper function
        helper.myActionHelper(component);
        return ret;
    },
})Design: Design time/compile time properties of a lightning component. A lightning component can be published multiple times in a page. If we want the behaviour of the component to change with each publish, we use this.
SVG (Scalable Vector Graphics): Give us unique icon/branding to the component.
All these files are used in lightning components to define the functionalities.
Attributes act like a variable to store different types of values.
An aura attribute is like a variable that we use in programming language or in Apex class. These are typed fields and set on a specific instance of a component. These attributes can be used inside the component as expressions and in controller and helper as well.
Types of Attributes
A: Basic Types
These are the basic attributes that contain values of primitive types like integer, string, boolean etc.
1. String :- It stores simple text values like color, name etc.
2. Boolean :- It stores boolean values like true or false.
3. Decimal :- It stores values with fractional part. Used to store values like price.
4. Integer :- It stores integer/Number values like quantity etc.
5. Double :- It stores fractional values like price, currency values.
6. Date :- It stores date values in yyyy-mm-dd format.
7. DateTime :- It stores date values with timestamp.
8. Long :- It stores non fractional values with wider range than integer.
B: Collection Types
Lightning supports the collection type attributes like array, list and map.
1. Array : An array of items of a defined type
2. List: An ordered collection of items.
3. Map: A collection that maps keys to values. A map can’t contain duplicate keys. Each key can map to at most one value. Defaults to an empty object, {}.
4. Set: A collection that contains no duplicate elements. The order for set items is not guaranteed. For example, “[‘Red’, ‘Green’, ‘Blue’]” might be returned as Blue, Green, Red.
Attributes of these types are typically used in iterations in lightning to display data.
C: Object Types
An attribute can have the type as “Object”. The object is stored in json format.
Example
<aura:component>
    <aura:attribute name="Company" type="string" description="Best CRM Company" default="Salesforce">
    </aura:attribute>
</aura:component>
Mind it!
name, type, default and description we have some more attributes (properties) of aura:attribute such as:name : Name of an attribute. [Required/Mandatory]
type : Type of information to be stored. [Required/Mandatory].
default : Default value of an attribute.
access : Indicates whether the attribute can be used outside of its own namespace. Possible values are: public (default), and global, and private.
required : Is it required or not – Possible Values: true or false(default)
Lightning supports the collection type attributes like array, list and map.
1) Array
2) List
3) Map
4) Set
1. Array : An array of items of a defined type
To define the attribute for storing array values we can write:
<aura:attribute name="ColorArray" type="String[]" default="['Red','Blue','Green']">
</aura:attribute>2. List : An ordered collection of items.
To define the attribute for storing values in order we can write:
<aura:attribute name="ColorList" type="List" default="['Red','Blue','Green']">
</aura:attribute>3. Map : To define the attribute for mapping keys to values.
<aura:attribute name="ColorMap" type="Map" default="{1:'Red',2:'Blue',3:'Green'}">
</aura:attribute>cmp.get("v.ColorMap")['1'].4. Set : A collection that contains no duplicate elements. The order for set items is not guaranteed.
For example, “[‘Red’, ‘Blue’, ‘Green’]” might be returned as Blue, Green, Red.
To define the attribute for Values which are unique.
<aura:attribute name="ColorSet" type="Set" default="['Red','Blue','Green','Red']">
</aura:attribute>Attributes of these types are typically used in iterations in lightning to display data.
Value provider is a way to access data. They are two value providers as v (View) and c (controller).
v (View) Value Provider: This value provider enables you to access the value of a component’s attribute in the component’s markup.
Example
In below component the name of the attribute is defined as “Salesforce” String, If no value is specified, it defaults to “World”. Where “v” is the value provider for a component attribute which represent the view.
Component
<aura:application>
    <aura:attribute name="Salesforce" type="String" default="World"/>
    Hello {!v.salesforce}! // Fetching value from attribute.
</aura:application>
c (Controller) Value Provider: This value provider enables you to wire up event handlers and action for the component. Client side controller handles events within a component. It’s a JavaScript resource that defined the functions for all of the components actions.
Example
In below component the name of the attribute is defined as “text” String, If no value is specified, it defaults to “Just a string” and “v” is the value provider for a component attribute which represent the view. The Lightning framework button wires the onclick attribute in the lightning:button component to the handleClick action in the controller.
Component
<aura:component>
    <aura:attribute name="text" type="String" default="Just a string."/>
    <lightning:button label="Click Me!" onclick="{!c.handleClick}"/>
     {!v.text} // Value provider
</aura:component>
A client-side controller handles events within a component. It’s a JavaScript resource that defines the functions for all of the component’s actions.
In the below Component Controller handleClick function, notice that the first argument to every action is the component to which the controller belongs. One of the most common things you’ll want to do with this component is look at and change its attribute values.
component.get("v.attributeName") returns the value of the attributeName attribute.
component.set("v.attributeName", "attribute value") sets the value of the attributeName attribute.
Component Controller
({
    handleClick : function(component, event, helper) {
       // using value provider in javascript controller to get attribute value.
        var attributeValue = component.get("v.text");
        console.log("String Value: " + attributeValue);
        var changeStringValue = 'Change the string value';
       //setting some other value in attribute.
        component.set("v.text", changeStringValue);
    }
})$A.enqueueAction(action) adds the server-side controller action to the queue of actions to be executed. All actions that are enqueued will run at the end of the event loop. The actions are asynchronous and have callbacks.
As we know, the application which we are using in salesforce lightning is running on a browser.
Any application which you load that might have some data. That data is not on the client-side machine, it is in the server.
Let's consider the following diagram :

As you can observe in the above diagram, Basically we will write a server-side controller which contains some data.
Then from our client-side controller will call a server-side controller and get the data from it.
When we call a server-side controller i.e (Apex controller) method from a client-side controller i.e (Javascript controller), Apex controller method return results. In the javascript controller, We use
action.setCallbackwhich runs after the apex method execution gets completed in the apex controller.
In another way : Server-side controller is nothing but apex class which contains some specific data that you need to take care of.
When we use apex class as a server-side controller we have to use with sharing keyword to respect security in salesforce.
Syntax
public with sharing class SimpleServerSideController
{
}
Example
Server Side Controller : SimpleServerSideController.apxc
public with sharing class SimpleServerSideController
{
 @AuraEnabled
 public static String serverEcho (String firstName)
 {
  return('Hello from the server'+ firstName);
 }
}
Mind it!
Methods inside the server-side controller are static and stateless means they do not maintain state (They don't care who is calling them).
Also, we have to use @AuraEnabled to enable the client and server-side access to the method.
Lightning Component : serverSide.cmp
<aura:component controller="SimpleServerSideController">
  <aura:attribute name="firstName" type="string" default="LearnFrenzy"/>
<ui:button label="callServer" press="{!c.echo}"/>
</aura:component>
JS Controller : serverSideController.js
({
    "echo" : function(cmp) {
        // create a one-time use instance of the serverEcho action
        // in the server-side controller
        var action = cmp.get("c.serverEcho");
        action.setParams({ firstName : cmp.get("v.firstName") });

        // Create a callback that is executed after
        // the server-side action returns
        action.setCallback(this, function(response) {
            var state = response.getState();
            if (state === "SUCCESS") {
                // Alert the user with the value returned
                // from the server
                alert("From server: " + response.getReturnValue());

                // You would typically fire a event here to trigger
                // client-side notification that the server-side
                // action is complete
            }
            else if (state === "INCOMPLETE") {
                // do something
            }
            else if (state === "ERROR") {
                var errors = response.getError();
                if (errors) {
                    if (errors[0] && errors[0].message) {
                        console.log("Error message: " +
                                 errors[0].message);
                    }
                } else {
                    console.log("Unknown error");
                }
            }
        });

        // optionally set storable, abortable, background flag here

        // A client-side action could cause multiple events,
        // which could trigger other events and
        // other server-side action calls.
        // $A.enqueueAction adds the server-side action to the queue.
        $A.enqueueAction(action);
    }
})
In the above serverSideController.js Controller we used action.setcallback, which says that the value which we are getting from the server-side controller is correct or not.
Hence we will get three types of response from the server SUCCESS or INCOMPLETE or ERROR.
At last in serverSideController.js Controller we have used $A.enqueueAction(action); which will add server side action to queue.
action.setCallback is use for checking the response coming from action is correct or not if it is SUCCESS, INCOMPLETE, ERROR.
Now check our code so let's create aura application :
Lightning Application: serverSideApp.app
<aura:application extends="force:slds">
    <c:serverside></c:serverside>
</aura:application>
Output
Click On callServer button

A comma-separated list of interfaces that the component implements. An interface defines where Lightning Components are available. The following some of the available interfaces and their importance:
| Interface | Description |
|---|---|
| force:appHostable | Make a component to be used as a custom tab in Lightning Experience or the Salesforce app. |
| force: lightningQuickAction | This interface make your component available for display in a panel with standard action controls, such as a Cancel button. By using this interface component can also display and implement their own controls, but should handle events from the standard controls. Note: If you implement force: lightningQuickAction in your component, you can’t implement force: lightningQuickActionWithoutHeader within the same component.
|
| force:lightningQuickActionWithoutHeader | Make your component to display in a panel without additional controls. Your component should provide a complete user interface for the action. Note: If you implement force: lightningQuickActionWithoutHeader in your component, you can’t implement force: lightningQuickAction within the same component.
|
| forceCommunity:availableForAllPageTypes | Make your Lightning component available for Community Builder. |
| flexipage:availableForAllPageTypes | It’s a global interface that available component in the Lightning App builder, and for any types of Lightning page. Note: To make a component available for utility bar flexipage:availableForAllPageTypes interface must be used in your component.
|
| flexipage:availableForRecordHome force:hasRecordId |
Make your Lightning component available for record pages. |
| lightning:actionOverride | Action pages. |
| ltng:allowGuestAccess | Using this interface in your Lightning Out dependency app, available to users without requiring them to authenticate with Salesforce. This interface lets you deploy your app with lightning component anywhere and to anyone. |
By using force:hasRecordId interface in lightning component we can assigned the id of the current record to lightning component. This interface adds an attribute named "recordId" to the component. The type of attribute is string and has 18-character Salesforce record ID.
To make our component available for record page and any other type of page, we need to implement the interface flexipage:availableForAllPageTypes
Lightning:actionOverride interface Enables a component to be used as an override for a standard action. We can override the View, New, Edit, and Tab standard actions on most standard and all custom components.
The component needs to implement the interface Lightning:actionOverride after which the component appear in the Lightning Component Bundle menu of an object action Override Properties panel.
Example
<aura:component implements="lightning:actionOverride">

</aura:component>
Mind it!
Hey Guys, I have solved some scenario based questions which i think was really helpful for me, so I thought sharing them would be a help for you all.
So let’s start by solving some requirements below.
Scenario: Override the standard new button action on the contact object.
Solution
Lightning Component : ContactInformation.cmp
<aura:component controller="ContactInformationController" implements="force:hasRecordId,
                            flexipage:availableForAllPageTypes,
                            lightning:actionOverride">

    <aura:attribute name="firstName" type="string"/>
    <aura:attribute name="lastName" type="string"/>

    <lightning:input label="Enter First Name" value="{!v.firstName}"/>
    <lightning:input label="Enter Last Name" value="{!v.lastName}"/>
    <lightning:button label="Add Contact" onclick="{!c.addContact}"/>

</aura:component>
JS Controller : ContactInformationController.js
({
    addContact : function(component, event, helper) {
        alert('lightning action override');
        var fName=component.get("v.firstName");
        var lName=component.get("v.lastName");
        var action=component.get('c.insertContact');
        action.setParams({

            ParentAccountId:component.get("v.recordId"),
            FirstName:component.get("v.firstName"),
            LastName:component.get("v.lastName")

        });
        action.setCallback(this,function(response){
            var state=response.getState();
            if(state==="SUCCESS")
            {
                alert('Contact inserted successfully');
            }

        });
        $A.enqueueAction(action);

    }
})
Server Side Controller : ContactInformationController.apxc
public class ContactInformationController {
    @AuraEnabled
    public static contact insertContact(string ParentAccountId,string FirstName,string LastName)
    {
        system.debug('Test');
        contact con=new contact();
        con.firstName = FirstName;
        con.lastName = LastName;
        con.accountid = ParentAccountId;
        insert con;
        return con;

    }
}
Now, to override the standard new button action Go to >SETUP > OBJECT MANAGER > Buttons, Links, and Actions > Goto New > Click Edit.
Override the Lightning experience and Mobile view with the Lightning component.

Interface flexipage:availableForRecordHome make the component available for record pages only.
Example
<aura:component implements="flexipage:availableForRecordHome" access="global">

</aura:component>
Mind it!
Hey Guys, I have solved some scenario based questions which i think was really helpful for me, so I thought sharing them would be a help for you all.
So let’s start by solving some requirements below.
Scenario: Make the component available at account detail page to insert contact.
Solution
We have implemented interface force:hasRecordId to obtain accountId using recordId attribute from account detail page and to make our component available for record page only, we need to implement the interface flexipage:availableForRecordHome.
Lightning Component : ContactInsert.cmp
<aura:component controller="ContactInsertController" implements="force:hasRecordId,
                            flexipage:availableForRecordHome">

  <aura:attribute name="firstName" type="string"/>
    <aura:attribute name="lastName" type="string"/>

    <lightning:input label="Enter First Name" value="{!v.firstName}"/>
    <lightning:input label="Enter Last Name" value="{!v.lastName}"/>
    <lightning:button label="Add Contact" onclick="{!c.addContact}"/>

</aura:component>
JS Controller : ContactInsertController.js
({
 addContact : function(component, event, helper) {

        var fName=component.get("v.firstName");
        var lName=component.get("v.lastName");
        var action=component.get('c.insertContact');  // Calling Apex Controller method
        action.setParams({

            ParentAccountId:component.get("v.recordId"),  // Passing parameter

            FirstName:component.get("v.firstName"),

            LastName:component.get("v.lastName")

        });
        action.setCallback(this,function(response){
            var state=response.getState();
            if(state==="SUCCESS")
            {
                alert('Contact inserted successfully');
            }

        });
        $A.enqueueAction(action);

 }
})
Server Side Controller : ContactInsertController.apxc
public class ContactInsertController {
@AuraEnabled
public static contact insertContact(string ParentAccountId,string FirstName,string LastName)
{
    system.debug('Test');
    contact con=new contact();
    con.firstName=FirstName;
    con.lastName=LastName;
    con.accountid=ParentAccountId;
    insert con;
    return con;

}
}
Add ContactInsert Component in Account Record Page
Screen Image from Account record page:

We can directly call a child component controller method from the parent component controller method using Aura:method. This method is used to pass value from parent component controller to the child component controller.
Now let us see the use with simple example,
Lightning Component : Child.cmp
<aura:component>

    <aura:method name="messageMethod" action="{!c.getMessage}" access="public">
        <aura:attribute name="param1" type="String" default="Hello"/>
        <aura:attribute name="param2" type="String" default="Salesforce Lightning "/>
    </aura:method>
</aura:component>
Lightning Component : ChildController.js
({
    getMessage : function(component, event) {
        //get method paramaters
        var params = event.getParam('arguments');
        if (params) {
            var param1 = params.param1;
            var param2 = params.param2;
            alert(param1 + " " + param2);
        }
    }
})
Lightning Component : Parent.cmp
<aura:component>
    <div class="slds-m-around_xx-large">

        <c:child aura:id="childCmp"/>

       <lightning:button variant="brand" label="Call Aura Method" onclick="{!c.callAuraMethod}"/>
  </div>
</aura:component>
Lightning Component : ParentController.js
({
    callAuraMethod : function(component, event, helper) {
        //Call Child aura method
        var childComponent = component.find("childCmp");
        var message = childComponent.messageMethod();
    }
})

This is also called as the constructor of lightning component. The init event is called once the component construction is over.
As an example if I am creating a simple registration page and I want to display some default text value after page load in my input boxes. I can do this by calling the javascript controller method and setting some default value in the attributes.
Basic Syntax
<aura:handler name="init" value="{!this}" action="{!c.doinit}"/>The change event is called when the value in one of the attribute changes.
As an Example If i am having attribute " Params", on change of attribute "Params" if I want to call javascript method i can do this as:
<aura:attribute name="Params" type="String" />
<aura:handler  name="change" value="{!v.Params}" action="{!c.doinit}"/>
This example updates an attribute value, which fires the aura:valueChange event.
Lightning Component : ChangeEvent.cmp
<aura:component implements="force:appHostable">
    <aura:attribute name="amount" type="Decimal"/>
    <aura:handler name="change" value="{!v.amount}" action="{!c.handleValueChange}"/>

    <div class="slds-size_1-of-2">
        <div class="slds-box slds-box_x-small">
            <lightning:input value="{!v.amount}" type="Decimal" label="Enter Amount"/>

            <lightning:button variant="brand" label="Update" onclick="{!c.changeValue}"/>
        </div>
    </div>

</aura:component>
JS Controller : ChangeEventController.js
({
    changeValue : function(component, event, helper) {
        component.set("v.amount", "9.0");
    },

    handleValueChange : function (component, event, helper) {
        alert("Changed amount : " + component.get("v.amount"));
    }
})

Lightning framework is based on event-driven architecture which allows to communicate between different events. Lightning events are fired from JavaScript controller actions that are triggered by a user interacting with the user interface.
There are two types of events in the framework:
Component Events can be handled by same component or a component that instantiates or contains the component. The component events can only be registered in child component and handled by parent component.
Component Event Example
In below example by using component event, I’m passing the values from a child component to a parent component via event.
Component Event
Create a sample component type event. Use type=”COMPONENT” in the aura:event tag for a component event. The attribute type is the one that will differentiate Component event from Application event.
<aura:event type="COMPONENT" description="Component Event">
    <aura:attribute name="message" type="String" default="Hello Learnfrenzy!!" />
</aura:event>
Child Component
The event is registered in this component by using aura:registerEvent in its markup.
Lightning Component : Child.cmp
<aura:component>
    <aura:registerEvent name="sampleCmpEvent" type="c:ComponentEvent" />
    <lightning:button label="Click To Fire Event" variant="brand" onclick="{!c.childComponentEvent}"/>
</aura:component>To set the attribute values of event, call event.setParam() or event.setParams().
JS Controller : ChildController.js
({
    childComponentEvent : function(component, event,helper) {
        //Get the event using registerEvent name.
        var cmpEvent = component.getEvent("sampleCmpEvent");
        //Set event attribute value
        cmpEvent.setParams({"message" : "Welcome "});
        cmpEvent.fire();
    }
})
Parent Component
The component event handled by the Parent Component that fired using aura:handler in the markup.
The name attribute in aura:handler must match the name attribute in the aura:registerEvent tag in the Child Component that fires the event.
The action attribute of aura:handler sets the client-side controller action to handle the event.
Lightning Component : Parent.cmp
<aura:component>
    <aura:attribute name="eventMessage" type="String"/>
    <aura:handler name="sampleCmpEvent" event="c:ComponentEvent" action="{!c.parentComponentEvent}"/>
    <div class="slds-m-around_xx-large">
        <c:child/>
        <p>{!v.eventMessage}</p>
    </div>
</aura:component>
JS Controller : ParentController.js
({
    parentComponentEvent : function(component, event) {
        //Get the event message attribute
        var message = event.getParam("message");
        //Set the handler attributes based on event data
        component.set("v.eventMessage", message + 'Salesforce');
    }
})
Lightning Application
<aura:application extends="force:slds">
    <c:Parent/>
</aura:application>

Application events are used when you need two independent component to communicate with each other i.e. they don’t need to be in the component hierarchy or nested within each other. Application events are handled by all components that are listening to the event. These events are essentially a traditional publish-subscribe model.
Application Event Example
In below example by using Application event, I’m passing the values from Notifier component to a Handler Component via event.
Application Event
Create a sample application type event. Use type=”APPLICATION” in the aura:event tag for an application event. The attribute type is the one that will differentiate Application event from Component event.
<aura:event type="Application" description="Sample Application Event">
    <aura:attribute name="message" type="String" />
</aura:event>
Lightning Component : Notifier.cmp
The notifier component registers the application using registerEvent tag and specifying the name of the application event.
<aura:component>
<aura:registerEvent name="appEvent"  type="c:ApplicationEvent"/>
  <lightning:button label="Click here to fire an application event"
                    variant="brand"
                    onclick="{!c.fireApplicationEvent}" />
</aura:component>
JS Controller : NotifierController.js
({
	fireApplicationEvent : function(component, event, helper)
    {
        // Get the application event by using the
        // e.<namespace>.<event> syntax
        var appEvent = $A.get("e.c:ApplicationEvent");
       //Set event attribute value
       appEvent.setParams({"message" : "Welcome "});
       appEvent.fire();
    }
})
Handler Component
The application event handled by the HandlerCmp that fired using aura:handler in the markup.
The action attribute of aura:handler sets the client-side controller action to handle the event.
Lightning Component : Handler.cmp
<aura:component>
    <aura:attribute name="messageFromEvent" type="String"/>
    <aura:handler event="c:ApplicationEvent" action="{!c.handleApplicationEvent}"/>
    <div class="slds-m-around_xx-large">
        <p>{!v.messageFromEvent}</p>
    </div>
</aura:component>
JS Controller : HandlerController.js
({
    handleApplicationEvent : function(component, event) {
        //Get the event message attribute
        var message = event.getParam("message");
        //Set the handler attributes based on event data
        component.set("v.messageFromEvent", message + 'LearnFrenzy');
    }
})
Lightning Application
<aura:application extends="force:slds">
    <c:Notifier/>
    <c:Handler/>
</aura:application>

| Component Events | Application Events |
|---|---|
| • Component Events can be handled by same component or a component that instantiates or contains the component. | • Application Events are handled by any component have handler defined for event.These events are essentially a traditional publish-subscribe model. |
| • The component events can only be registered in child component and handled by parent component. | • Application event can be used through out the application. |
• We use attribute type="COMPONENT" in the aura:event tag for an component event. |
• We use attribute type="APPLICATION" in the aura:event tag for an application event. |
• While handling component events, we need to specify name attribute in aura:handler. The name attribute in aura:handler must match the name attribute in the aura:registerEvent tag in the Child Component that fires the event. |
• While handling application events, no need to specify name attribute in aura:handler. |
• We use cmp.getEvent("evtName") in JavaScript to get an instance of the Component type event.Component must reference events by name, much like an aura:id, and retrieve them from its component (hence cmp.get()) value provider: |
• We use $A.get("e.myNamespace:myAppEvent") in JavaScript to get an instance of the Application type event.Those are obtained from the global (hence $A.get()) event value provider: |
We should always use Component events whenever possible this is because Component events can only be handled by parent components so the components in picture are only those components which needs to know about them.
Mind it!
Component events to talk to a parent using the capture and bubbling mechanism, like with DOM events. Usually, one component is interested by the event, like an event aggregator.
Application events to broadcast to other components and not exclusively ancestors. Applications events can talk to many components that can be interested by the event. The broadcast can be boxed to an area of the DOM.
There are two phases in component event propagation.
1. Bubble Phase
2. Capture Phase
There are three phases in application event propagation.
1. Bubble Phase
2. Capture Phase
3. Default Phase
When we work with components, the first thing we do is declaring the attributes and initialize them. We use expressions for initializing our components. There are two types of expressions, bound and unbound that are used to perform data binding in Lightning Components.
Bound Expression: Bound Expression is represented as {!v.str}. Whenever the value of the string is changed, this expression will reflect the change and also affect the components where it is used, we can say the value change dynamically through this expression.
Unbound Expression: Unbound Expression is represented as {#v.str}. Whenever the value of the string is changed, this expression will not reflect the change, we can say the value remains static through this expression.
Example
Lightning Component : Expression.cmp
<aura:component implements="force:appHostable,flexipage:availableForAllPageTypes" access="global">
    <aura:attribute name="str" type="string" default="Hello World!"/>
    <ui:outputText value="Enter a string value : "/><ui:inputText value="{!v.str}"/>
    <ui:outputText value="{#v.str}"/>
    <ui:outputText value="{!v.str}"/>
</aura:component>
Lightning Application
<aura:application extends="force:slds">
    <c:expression/>
</aura:application>

lightning:navigation component is used to generate salesforce URL from pageReference or generate a pageReference without manually building it.
To navigate we need to define a PageReference object.
The pageReference type generates a unique URL format and defines attributes that
apply to all pages of that type. Using v.pageReference we can capture the URL parameters.
Following are the supported type where we can navigate,
Let’s learn more about this component.
It has following two methods :
1. generateUrl : This method is use to generate url for a given page reference. This method used ‘page reference’ as parameter.
2. navigate : This method is used to navigate to specified page reference. This method used two parameters ‘page reference’ and ‘replace’.
#page reference : It is a javascript object that represent reference to a page, providing a well-defined structure that describes the page type and its corresponding values.
The following PageReference properties are supported:
type : It defines API name of page, for example : for standard object page we use ‘standard__objectPage’ , for record page type we use ‘standard__recordPage’. It is required.
attributes : It is also required. It defines the value for each attribute to generate pagereference, for example objectApiName, recordId, action.
state : This property is optional. This property defines parameter of page url to be generated.
It is used to display data from component where we are navigating based on some filters: Ex: Navigating to account page we can use state as,
state: {
    filterName: "RecentlyViewedAccounts"
}
or
state: {
    filterName: "MyAccounts"
}
#replace : It is boolean value which indicates whether new page should replace the current page in navigation history. It is optional.
Note :
1. To use this component we must implement “home:availableForDesktop” or “flexipage:availableForAllPageTypes” interface.
2. If we are navigating to component than the component where we are navigating must implement lightning:isUrlAddressable interface.
To Navigate to component sample syntax used is as below:
{
    "type": "standard__component",
        "attributes": {
            "componentName": "c__MyLightningComponent"
        },
            "state": {
                "myAttr": "attrValue"
            }
}
Example
In this example we are going to generate a navigation link which navigate to standard account list page and a record view page.
Lightning Component : Navigation.cmp
<aura:component implements="flexipage:availableForAllPageTypes">
    <aura:attribute name="url" type="String"/>

    <aura:handler name="init" value="{! this }" action="{! c.setPagref }"/>
    <lightning:navigation aura:id="navLink"/>
    <div>
        <a href="{!v.url}" target="_blank"> Go to Account </a>

        <lightning:button label="Navigate to Record view page"
                          title="Record View Page"
                          onclick="{!c.goToRecord}" variant="brand"/>
    </div>
</aura:component>
JS Controller : NavigationController.js
({
    setPagref : function(component, event, helper) {
        var navLink = component.find("navLink");

        var pageReference = {
            type: 'standard__objectPage',
            attributes: {
                actionName: 'list',
                objectApiName: 'Account',

            },
            state: {
                filterName: "MyAccounts"
            }
        };

        // Set the URL on the link or use the default if there's an error

        navLink.generateUrl(pageReference).then($A.getCallback(function(a) {
            component.set("v.url", a ? a : "#");
        }), $A.getCallback(function(error) {
            component.set("v.url", "#");
        }));
    },
    goToRecord: function(component, event, helper) {
        var navLink = component.find("navLink");
        var pageReference = {
            type: 'standard__recordPage',
            attributes: {
                actionName: 'view',
                objectApiName: 'Contact',
                recordId : '0032w000004V1WHAA0' // change record id.
            },
        };
        navLink.navigate(pageReference, true);
    }
})–> Component Output

–> Url generated by “setPagref”function is : “/lightning/o/Account/list?filterName=MyAccounts ”

–> Navigation url in “goToRecord” function is : “/lightning/r/Contact/0032w000004V1WHAA0/view”

If we are navigating to a component, then the component where we are navigating to must implement lightning:isUrlAddressable interface to navigate there successfully.
We will use "Init" Event which is also called as the constructor of lightning component.The init event is called once the component construction is over.
Basic Syntax
<aura:handler name="init" value="{!this}" action="{!c.doinit}"/>
One short email when we publish something new — interview questions, Salesforce guides and career tips. No spam, unsubscribe in one click.
Thirty Salesforce CPQ interview questions with answers — quote-to-cash, products, bundles, price rules, product rules, approvals and contracts.
The 30 Salesforce Apex interview questions asked most — collections, SOQL, DML, governor limits, triggers, async Apex and testing — with answers.
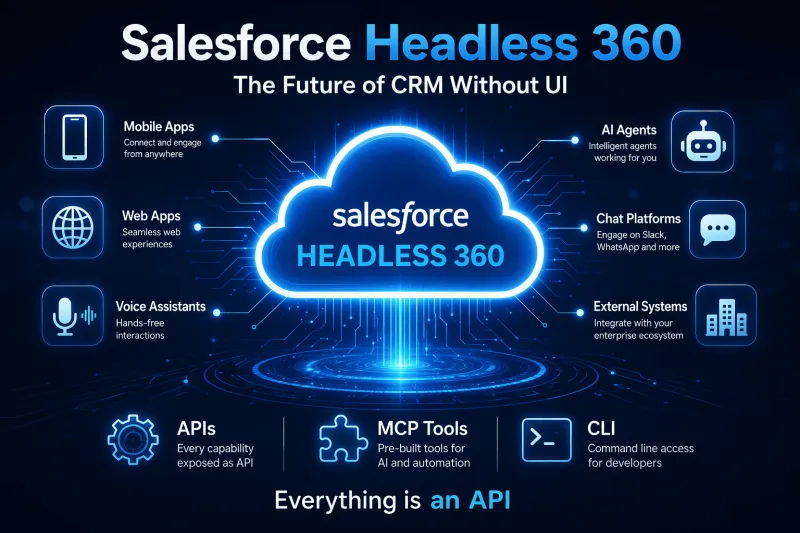
Salesforce Headless 360 explained — what headless CRM means, how APIs and data cloud power it, and what it changes for developers and businesses.
Questions, corrections or your own experience — they all help the next reader.
Anjali Singh
Joythi Kumari
Gaurav Verma
Kirtesh
Siddharth
LearnFrenzy Team