
Understanding Decorators and Lifecycle Hooks in Salesforce LWC
Understand LWC decorators (@api, @track, @wire) and lifecycle hooks with clear examples — what each does and when to use it in your components.
JavaScript fundamentals for Lightning Web Components — scope, this, closures, promises, events and modules — explained with LWC-focused examples.
JavaScript is the foundation of Lightning Web Components (LWC), enabling developers to build highly interactive and efficient applications on the Salesforce platform. As an LWC developer, mastering JavaScript is essential for handling component logic, managing state, interacting with Salesforce data, and ensuring smooth user experiences.
In this blog, we will cover essential JavaScript concepts required for LWC development, including variable declarations, arrow functions, template literals, destructuring, spread and rest operators, array methods (map, filter, reduce), reactive properties, event handling, JavaScript modules, Promises, error handling, and working with Salesforce data using @wire. Each concept will be explained with practical examples and outputs to help you understand how to use JavaScript effectively in your LWC projects.
In LWC, JavaScript code is organized into modules. Each component has its own JavaScript file, which is automatically imported and used by the framework. Modules allow you to encapsulate functionality, making your code reusable and maintainable.
Let’s break down the code snippet and explain each part in the context of Salesforce Lightning Web Components (LWC):
import { LightningElement } from 'lwc';
export default class GreetingComponent extends LightningElement {

}
1. import { LightningElement } from 'lwc';
What is import?
import statement is part of JavaScript ES6 modules. It allows you to include functionality from other modules or files into your current file.import is used to bring in core functionality, such as the base class LightningElement, or other utilities and modules.Why use LightningElement?
LightningElement is the base class for all Lightning Web Components.connectedCallback, renderedCallback).LightningElement, your component inherits all these features and becomes a valid LWC.What is 'lwc'?
'lwc' is a module provided by the Salesforce LWC framework.LightningElement class.import { LightningElement } from 'lwc';, you’re telling the framework to import the LightningElement class from the lwc module.2. export default class GreetingComponent extends LightningElement { }
What is export?
export statement is also part of JavaScript ES6 modules.export is used to make your component class available to the framework.Why use export default?
export default is used to define the primary export of a module.GreetingComponent) is the primary export of the file.export default class GreetingComponent, you’re telling the framework that this class is the main thing being exported from this file.What is class GreetingComponent extends LightningElement?
GreetingComponent.extends keyword is used to inherit from the LightningElement base class.LightningElement, GreetingComponent becomes a valid Lightning Web Component and gains access to all the features provided by the framework.import and export statements allow you to write modular code. You can split your code into reusable pieces and import them as needed.LightningElement, your component integrates seamlessly with the LWC framework. It can use lifecycle hooks, handle events, and render templates.import and export follows modern JavaScript standards, making your code cleaner and more maintainable.In your LWC component, you can import and use this function:
import { LightningElement } from 'lwc';

export default class GreetingComponent extends LightningElement {
    greeting = 'Hello, Salesforce Developer!';

    renderedCallback() {
        console.log('Component has rendered!');
    }
}
<template>
<p>{greeting}</p>
</template>Explanation
greeting property is displayed in the template using {greeting}.renderedCallback lifecycle hook logs a message when the component is rendered.Output
Hello, Salesforce Developer!var, let, and constJavaScript provides three ways to declare variables: var , let , and const. Understanding their differences is crucial for writing clean and bug-free code.
var: Function-scoped, can be redeclared and updated.let: Block-scoped, can be updated but not redeclared. The let keyword allows you to declare variables with a block scope, making them accessible only within the block (enclosed by curly braces {}). Variables declared with let can be reassigned a new value.const: Block-scoped, cannot be updated or redeclared. The const keyword is used to declare constants with a block scope. Once a variable is assigned using const, its value cannot be changed or reassigned.Example
// Declaring Variables using var, let, and const

// var Example
function varExample() {
    var x = 10;
    if (true) {
        var x = 20; // The value of x is changed globally
    }
    console.log(x); // Output: 20
}

// let Example
function letExample() {
    let y = 10;
    if (true) {
        let y = 20; // The value of y is limited to this block
    }
    console.log(y); // Output: 10 (The value of y remains unchanged)
}

// const Example
function constExample() {
    const z = 10;
    // z = 20; // Error: Assignment to constant variable
    console.log(z); // Output: 10
}

// Calling the functions
varExample(); // Output: 20
letExample(); // Output: 10
constExample(); // Output: 10
1. var
var is the oldest way to declare variables in JavaScript. It has some unique behaviors:
var are either globally scoped (if declared outside a function) or function-scoped (if declared inside a function).var name = "Saurabh";
if (true) {
var name = "Samir"; // Overrides the global 'name'
}
console.log(name); // Output: "Samir"Here, the variable name inside the if block overrides the global name because var is function-scoped, not block-scoped.
var are hoisted to the top of their scope. This means the declaration is moved to the top, but the assignment remains in place.console.log(age); // Output: undefined (no error, but value is not assigned yet)
var age = 20;The above code is interpreted as:
var age; // Declaration is hoisted
console.log(age); // Output: undefined
age = 20; // Assignment happens herevar allows redeclaration of the same variable in the same scope.var x = 10;
var x = 20; // No error, x is now 20
console.log(x); // Output: 202. let
let was introduced in ES6 to address the issues with var. It has block scope and stricter rules.
let are block-scoped, meaning they are only accessible within the block they are declared in.let name = "Saurabh";
if (true) {
let name = "Samir"; // This 'name' is scoped to the if block
}
console.log(name); // Output: "Saurabh" (not overridden)let variables are not hoisted in the same way as var. Accessing them before declaration results in a ReferenceError.console.log(age); // Error: Cannot access 'age' before initialization
let age = 20;let does not allow redeclaration of the same variable in the same scope.let education = "B.Tech";
let education = "M.Tech"; // Error: Identifier 'education' has already been declared3. const
const is also introduced in ES6 and is used to declare constants. It is similar to let but with additional restrictions.
let, const is block-scoped.const PI = 3.14;
if (true) {
const PI = 3.14159; // This 'PI' is scoped to the if block
}
console.log(PI); // Output: 3.14const variables cannot be reassigned after declaration.const z = 10;
z = 20; // Error: Assignment to constant variableconst prevents reassignment, it does not make objects or arrays immutable. You can still modify their properties or elements.const person = { name: "Alice" };
person.name = "Bob"; // Allowed
console.log(person); // Output: { name: "Bob" }
// Reassigning the object itself is not allowed
person = { name: "Charlie" }; // Error: Assignment to constant variableObject.freeze():const person = Object.freeze({ name: "Alice" });
person.name = "Bob"; // No error, but the value remains unchanged
console.log(person); // Output: { name: "Alice" }| Feature | var | let | const |
|---|---|---|---|
| Scope | Function or Global | Block | Block |
| Hoisting | Yes (with undefined) | No (Temporal Dead Zone) | No (Temporal Dead Zone) |
| Redeclaration | Allowed | Not Allowed | Not Allowed |
| Reassignment | Allowed | Allowed | Not Allowed |
| Use Case | Legacy code | Modern code | Constants |
Key Takeaways
let for variables that need to be reassigned.const for variables that should not be reassigned (e.g., constants, objects, or arrays where the reference should not change).var in modern JavaScript due to its function scope and hoisting behavior.This explanation and examples should help clarify the differences between var, let, and const in JavaScript!
JavaScript is a dynamically typed language, meaning variables can hold values of any data type without explicitly declaring the type. Understanding data types is fundamental to writing effective and bug-free code in Lightning Web Components (LWC).
JavaScript data types can be categorized into two main groups:
1. Primitive Data Types
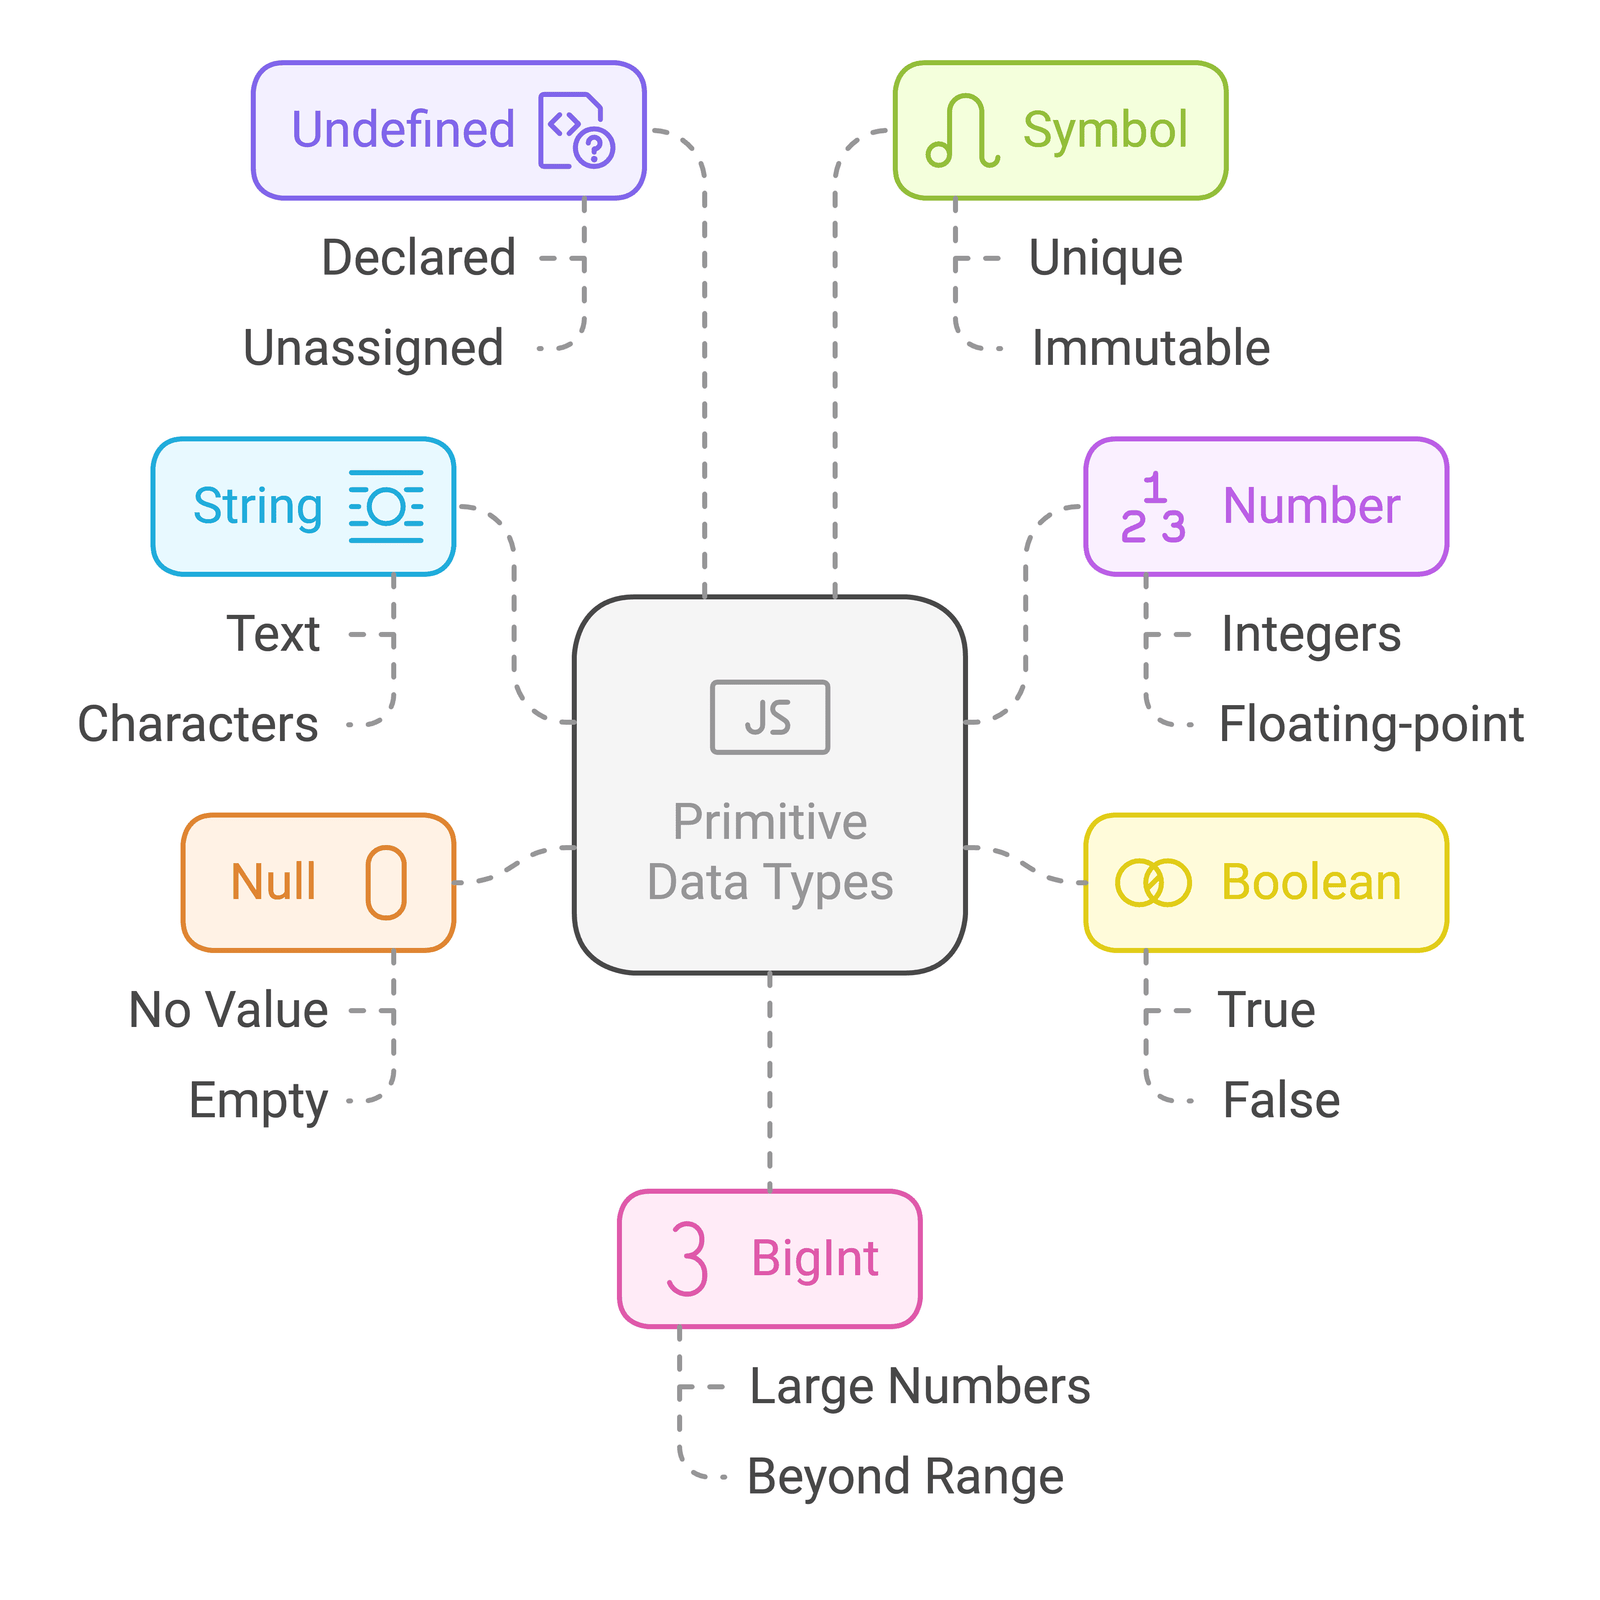
String: Represents textual data.Number: Represents numeric data (both integers and floating-point numbers).Boolean: Represents true or false.Null: Represents an intentional absence of any value.Undefined: Represents a variable that has been declared but not assigned a value.Symbol: Represents a unique and immutable value (introduced in ES6).BigInt: Represents large integers beyond the range of the Number type.2. Object Data Types
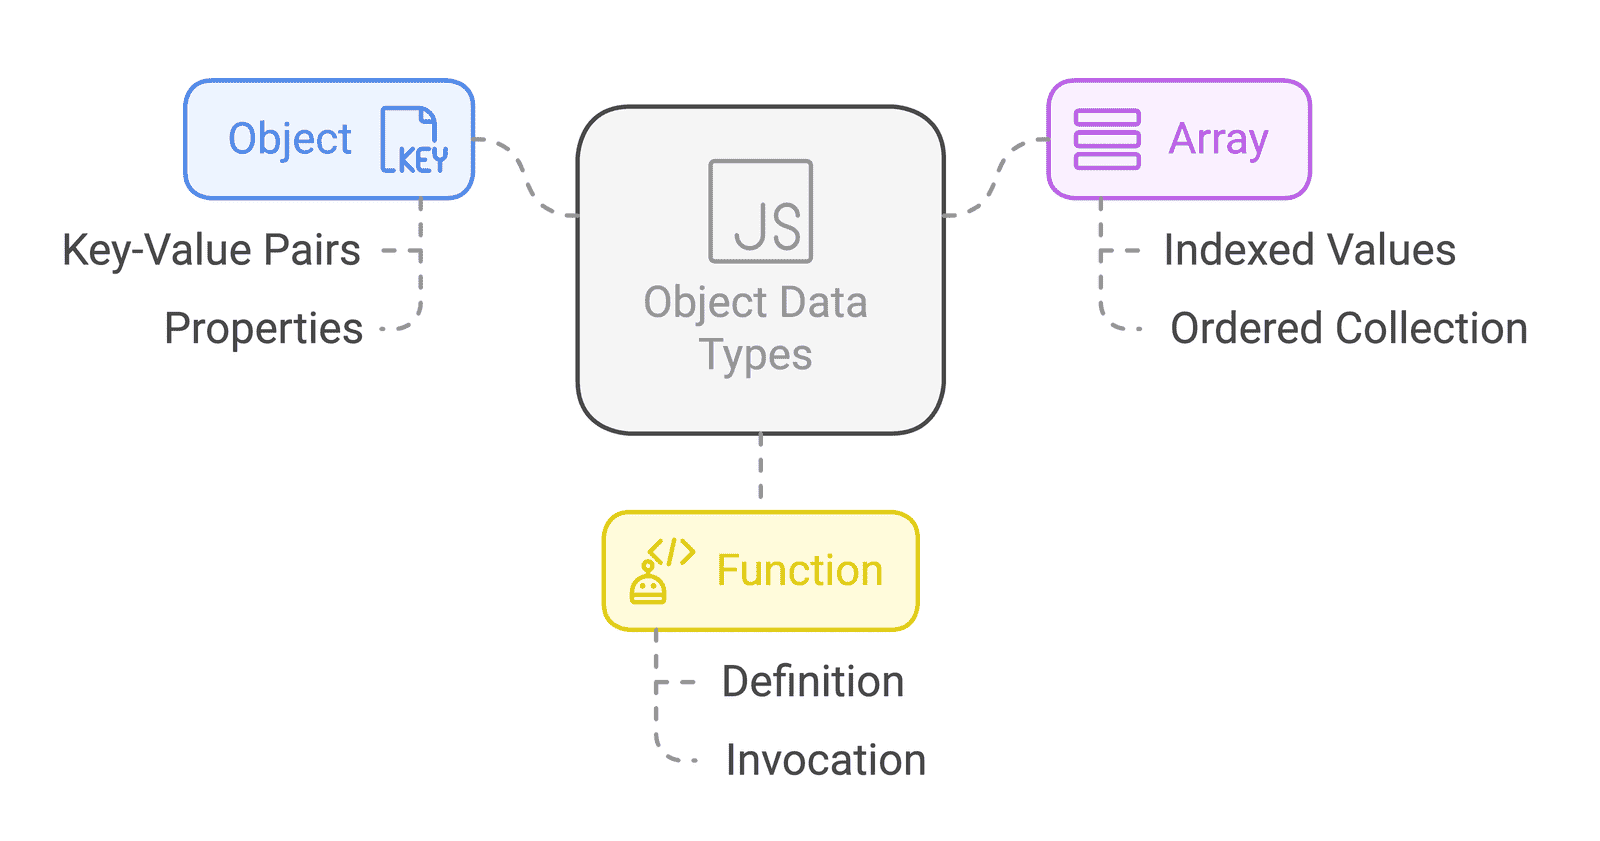
Object: A collection of key-value pairs.Array: A list-like collection of values.Function: A reusable block of code.Strings are used to represent text. They are enclosed in single quotes ('), double quotes ("), or backticks (`).
Example
export default class StringExample extends LightningElement {
    message = 'Hello, World!';
    name = "Saurabh Samir";
    greeting = `Welcome, ${this.name}!`; // Template literal

    connectedCallback() {
        console.log(this.message); // Output: Hello, World!
        console.log(this.greeting); // Output: Welcome, Saurabh Samir!
    }
}
Output:
Console logs:
Hello, World!
Welcome, Saurabh Samir!Numbers represent both integers and floating-point values.
Example
export default class NumberExample extends LightningElement {
    integer = 42;
    floatingPoint = 3.14;

    connectedCallback() {
        console.log(this.integer); // Output: 42
        console.log(this.floatingPoint); // Output: 3.14
    }
}
Output:
Console logs:
42
3.14Booleans represent logical values: true or false.
Example
export default class BooleanExample extends LightningElement {
    isActive = true;
    isDisabled = false;

    connectedCallback() {
        console.log(this.isActive); // Output: true
        console.log(this.isDisabled); // Output: false
    }
}
Output:
Console logs:
true
falseOne of the confusing topics in JavaScript is Null and Undefined.
null: is a primitive value that represents the intentional absence of any object value. It must be explicitly assigned to a variable.
Key Characteristics of null:
null is used to indicate that a variable has no value or that an object does not exist.typeof operator returns "object" for null (this is a historical bug in JavaScript).undefined and null with == (double equals) returns true because they are both false values.undefined and null with === (triple equals) returns false because they are of different types.Example
export default class NullExample extends LightningElement {
    length = null; // Variable explicitly assigned null

    connectedCallback() {
        console.log(this.length); // Output: null
        console.log(typeof this.length); // Output: object
        console.log(this.length == undefined); // Output: true (null == undefined)
        console.log(this.length === undefined); // Output: false (null !== undefined)
    }
}
Output:
Console logs:
null
object
true
false
undefined: is a primitive value that is automatically assigned to variables that have been declared but not initialized. It is also the default return value of functions that do not explicitly return a value.
Key Characteristics of undefined:
undefined if it has been declared but not assigned a value.typeof operator returns "undefined" for an uninitialized variable.undefined and null with == (double equals) returns true because they are both false values.undefined and null with === (triple equals) returns false because they are of different types.Example
export default class UndefinedExample extends LightningElement {
    length; // Variable declared but not initialized

    connectedCallback() {
        console.log(this.length); // Output: undefined
        console.log(typeof this.length); // Output: undefined
        console.log(this.length == null); // Output: true (undefined == null)
        console.log(this.length === null); // Output: false (undefined !== null)
    }
}
Output:
Console logs:
undefined
undefined
true
false
Mind it!
Key Differences Between undefined and null
| Aspect | undefined | null |
|---|---|---|
| Meaning | Variable declared but not initialized. | Intentional absence of any value. |
| Type | "undefined" | "object" (historical bug) |
| Default Assignment | Automatically assigned. | Must be explicitly assigned. |
| Comparison (==) | undefined == null is true. | null == undefined is true. |
| Comparison (===) | undefined === null is false. | null === undefined is false. |
Symbols are unique and immutable values, often used as object property keys.
Example
export default class SymbolExample extends LightningElement {
    symbol1 = Symbol('key1');
    symbol2 = Symbol('key2');

    connectedCallback() {
        console.log(this.symbol1 === this.symbol2); // Output: false
    }
}
Output:
Console logs:
falseBigInt is used to represent integers larger than the range supported by the Number type.
Example
export default class BigIntExample extends LightningElement {
    bigNumber = BigInt(9007199254740991);

    connectedCallback() {
        console.log(this.bigNumber); // Output: 9007199254740991n
    }
}
Output:
Console logs:
9007199254740991nObjects are collections of key-value pairs, often used to represent complex data structures.
Example
export default class ObjectExample extends LightningElement {
    user = {
        name: 'Saurabh Samir',
        age: 30,
        isAdmin: false
    };

    connectedCallback() {
        console.log(this.user.name); // Output: Saurabh Samir
        console.log(this.user.age); // Output: 30
    }
}
Output:
Console logs:
Saurabh Samir
30Arrays are ordered lists of values, which can be of any data type.
Example
export default class ArrayExample extends LightningElement {
    fruits = ['Apple', 'Banana', 'Cherry'];

    connectedCallback() {
        console.log(this.fruits[0]); // Output: Apple
        console.log(this.fruits.length); // Output: 3
    }
}
Output:
Console logs:
Apple
3Functions are reusable blocks of code that can be invoked to perform specific tasks.
Example
export default class FunctionExample extends LightningElement {
    greet(name) {
        return `Hello, ${name}!`;
    }

    connectedCallback() {
        console.log(this.greet('Saurabh')); // Output: Hello, Saurabh!
    }
}
Output:
Console logs:
Hello, Saurabh!Curious?
Let's combine these data types into a practical example for an LWC component.
Example
export default class DataTypesExample extends LightningElement {
    // Primitive Types
    name = 'Saurabh Samir'; // String
    age = 30; // Number
    isAdmin = false; // Boolean
    emptyValue = null; // Null
    unassignedValue; // Undefined

    // Object Types
    user = {
        name: 'Saurabh Samir',
        age: 25,
        isAdmin: true
    }; // Object

    fruits = ['Apple', 'Banana', 'Cherry']; // Array

    // Function
    greet(name) {
        return `Hello, ${name}!`;
    }

    connectedCallback() {
        console.log(this.name); // Output: Saurabh Samir
        console.log(this.age); // Output: 30
        console.log(this.isAdmin); // Output: false
        console.log(this.emptyValue); // Output: null
        console.log(this.unassignedValue); // Output: undefined
        console.log(this.user.name); // Output: Saurabh Samir
        console.log(this.fruits[1]); // Output: Banana
        console.log(this.greet('Developer')); // Output: Hello, Developer!
    }
}
Output:
Console logs:
Saurabh Samir
30
false
null
undefined
Saurabh Samir
Banana
Hello, Developer!Functions are the building blocks of JavaScript. They allow you to encapsulate reusable logic, making your code modular, maintainable, and easier to debug. In Lightning Web Components (LWC), functions are used extensively to handle user interactions, process data, and communicate with Salesforce APIs.
JavaScript supports several ways to define functions:
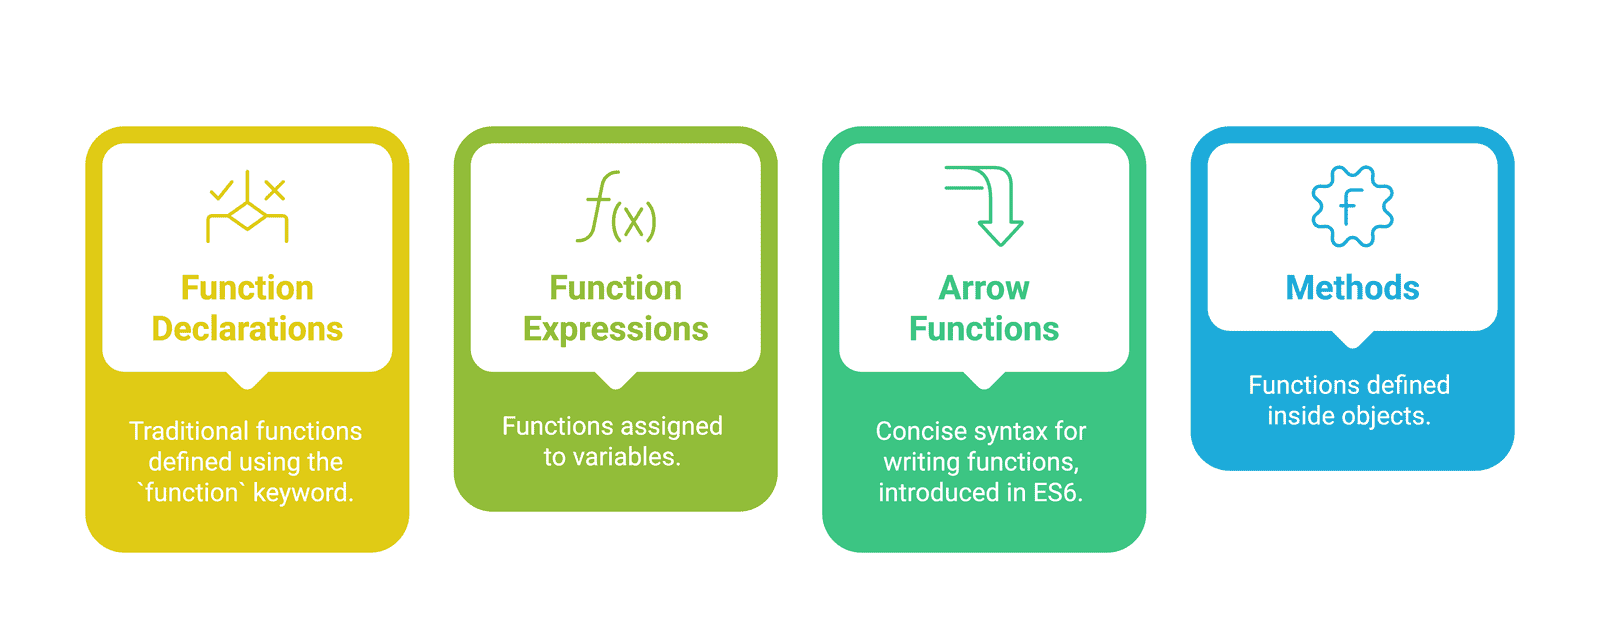
Function declarations are hoisted, meaning they can be called before they are defined in the code.
Example
export default class FunctionDeclarationExample extends LightningElement {
    // Function Declaration
    greet(name) {
        return `Hello, ${name}!`;
    }

    connectedCallback() {
        console.log(this.greet('Samir')); // Output: Hello, Samir!
    }
}
Output:
Console logs:
Hello, Samir!Function expressions are functions assigned to variables. They are not hoisted, so they must be defined before they are called.
Example
export default class FunctionExpressionExample extends LightningElement {
    // Function Expression
    greet = function(name) {
        return `Hello, ${name}!`;
    };

    connectedCallback() {
        console.log(this.greet('Samir')); // Output: Hello, Samir!
    }
}
Output:
Console logs:
Hello, Samir!Arrow functions provide a concise syntax for writing functions. They are particularly useful for short, single-expression functions and for preserving the context of this.
Example
export default class ArrowFunctionExample extends LightningElement {
    // Arrow Function
    greet = (name) => `Hello, ${name}!`;

    connectedCallback() {
        console.log(this.greet('Saurabh')); // Output: Hello, Saurabh!
    }
}
Output:
Console logs:
Hello, Saurabh!Methods are functions defined inside objects. They can access the object’s properties using the this keyword.
Example
export default class MethodExample extends LightningElement {
    user = {
        name: 'Saurabh Samir',
        greet: function() {
            return `Hello, ${this.name}!`;
        }
    };

    connectedCallback() {
        console.log(this.user.greet()); // Output: Hello, Saurabh Samir!
    }
}
Output:
Console logs:
Hello, Saurabh Samir!Curious?
Functions are often used to handle user interactions, such as button clicks.
Example
export default class ButtonClickExample extends LightningElement {
    handleClick() {
        console.log('Button clicked!');
    }
}
<template>
<button onclick="{handleClick}">Click Me</button>
</template>Output
When the button is clicked, the console logs:
Button clicked!Functions can be used to process data, such as formatting strings or performing calculations.
Example
export default class DataProcessingExample extends LightningElement {
    price = 19.99;
    taxRate = 0.07;

    calculateTotal() {
        return this.price * (1 + this.taxRate);
    }

    connectedCallback() {
        console.log(`Total: $${this.calculateTotal().toFixed(2)}`); // Output: Total: $21.39
    }
}
Output:
Console logs:
Total: $21.39Functions are essential for calling Apex methods or Lightning Data Service (LDS) to fetch or update data.
Example
import { LightningElement } from 'lwc';
import getContacts from '@salesforce/apex/ContactController.getContacts';

export default class ApiCallExample extends LightningElement {
    contacts;

    async fetchContacts() {
        try {
            this.contacts = await getContacts();
            console.log('Contacts fetched:', this.contacts);
        } catch (error) {
            console.error('Error fetching contacts:', error);
        }
    }

    connectedCallback() {
        this.fetchContacts();
    }
}
Output
If the Apex method returns data, the console logs:
Contacts fetched: [{...}, {...}, ...]You can create reusable utility functions to avoid code duplication.
Example
// utils.js
export function formatCurrency(amount) {
    return `$${amount.toFixed(2)}`;
}

// mainComponent.js
import { LightningElement } from 'lwc';
import { formatCurrency } from 'c/utils';

export default class UtilityFunctionExample extends LightningElement {
    price = 19.99;

    connectedCallback() {
        console.log('Formatted Price:', formatCurrency(this.price)); // Output: Formatted Price: $19.99
    }
}
Output:
Console logs:
Formatted Price: $19.99Control flow and conditional statements are fundamental to programming. They allow your code to make decisions and execute different blocks of code based on specific conditions. In Lightning Web Components (LWC), conditional statements like if, else, and switch are used to dynamically render components, handle user interactions, and process data.
Types of Conditional Statements
if Statement: Executes a block of code if a condition is true.else Statement: Executes a block of code if the if condition is false.else if Statement: Adds additional conditions to check if the previous conditions are false.switch Statement: Evaluates an expression and executes the corresponding block of code based on matching cases.1. if Statement
The if statement is used to execute a block of code only if a specified condition is true.
Example:
export default class IfStatementExample extends LightningElement {
    isLoggedIn = true;

    connectedCallback() {
        if (this.isLoggedIn) {
            console.log('User is logged in.'); // Output: User is logged in.
        }
    }
}
Output:
Console logs:
User is logged in.2. else Statement
The else statement is used to execute a block of code if the if condition is false.
Example:
export default class ElseStatementExample extends LightningElement {
    isLoggedIn = false;

    connectedCallback() {
        if (this.isLoggedIn) {
            console.log('User is logged in.');
        } else {
            console.log('User is not logged in.'); // Output: User is not logged in.
        }
    }
}
Output:
Console logs:
User is not logged in.3. else if Statement
The else if statement allows you to check multiple conditions. It is executed if the previous conditions are false.
Example:
export default class ElseIfStatementExample extends LightningElement {
    userRole = 'editor';

    connectedCallback() {
        if (this.userRole === 'admin') {
            console.log('User is an admin.');
        } else if (this.userRole === 'editor') {
            console.log('User is an editor.'); // Output: User is an editor.
        } else {
            console.log('User is a viewer.');
        }
    }
}
Output:
Console logs:
User is an editor.4. switch Statement
The switch statement evaluates an expression and executes the block of code that matches the expression’s value.
Example:
export default class SwitchStatementExample extends LightningElement {
    day = 'Monday';

    connectedCallback() {
        switch (this.day) {
            case 'Monday':
                console.log('Today is Monday.'); // Output: Today is Monday.
                break;
            case 'Tuesday':
                console.log('Today is Tuesday.');
                break;
            default:
                console.log('Today is some other day.');
        }
    }
}
Output:
Console logs:
Today is Monday.Curious?
You can use conditional statements to dynamically render components or HTML elements.
Example
export default class ConditionalRenderingExample extends LightningElement {
    isLoggedIn = true;

    get greeting() {
        return this.isLoggedIn ? 'Welcome back!' : 'Please log in.';
    }
}
<template>
<p>{greeting}</p>
<template if:true={isLoggedIn}>
<button>Log Out</button>
</template>
<template if:false={isLoggedIn}>
<button>Log In</button>
</template>
</template>Output
isLoggedIn is true, the component displays:Welcome back!
[Log Out Button]isLoggedIn is false, the component displays:Please log in.
[Log In Button]Conditional statements are useful for handling different user roles or permissions.
Example
export default class UserRoleExample extends LightningElement {
    userRole = 'editor';

    get isAdmin() {
        return this.userRole === 'admin';
    }

    get isEditor() {
        return this.userRole === 'editor';
    }
}
<template>
<template if:true={isAdmin}>
<p>Welcome, Admin!</p>
<button>Delete User</button>
</template>
<template if:true={isEditor}>
<p>Welcome, Editor!</p>
<button>Edit Content</button>
</template>
</template>Output
userRole is editor, the component displays:Welcome, Editor!
[Edit Content Button]You can use conditional statements to apply dynamic styles based on component state.
Example
export default class DynamicStylingExample extends LightningElement {
    isActive = true;

    get buttonClass() {
        return this.isActive ? 'active-button' : 'inactive-button';
    }
}
<template>
<button class={buttonClass}>Click Me</button>
</template>Output:
isActive is true, the button has the class active-button.isActive is false, the button has the class inactive-button.Conditional statements can be used to process data dynamically.
Example
export default class DataProcessingExample extends LightningElement {
    score = 85;

    get grade() {
        if (this.score >= 90) return 'A';
        else if (this.score >= 80) return 'B';
        else if (this.score >= 70) return 'C';
        else return 'F';
    }

    connectedCallback() {
        console.log(`Grade: ${this.grade}`); // Output: Grade: B
    }
}
Output:
Console logs:
Grade: BYou can nest conditional statements to handle complex logic.
Example
export default class NestedConditionExample extends LightningElement {
    user = {
        isLoggedIn: true,
        role: 'admin'
    };

    connectedCallback() {
        if (this.user.isLoggedIn) {
            if (this.user.role === 'admin') {
                console.log('Welcome, Admin!'); // Output: Welcome, Admin!
            } else {
                console.log('Welcome, User!');
            }
        } else {
            console.log('Please log in.');
        }
    }
}
Output:
Console logs:
Welcome, Admin!Loops and iterations are fundamental concepts in programming that allow you to execute a block of code repeatedly. In Lightning Web Components (LWC), loops are used to manipulate data, render dynamic lists, and perform repetitive tasks efficiently. JavaScript provides several ways to iterate over data, including for, while, and array methods like map, filter, and reduce.
for Loop: Executes a block of code a specific number of times.while Loop: Executes a block of code as long as a condition is true.for...of Loop: Iterates over iterable objects like arrays.map(): Creates a new array by transforming each element in the original array.filter(): Creates a new array with elements that pass a test.reduce(): Reduces an array to a single value by applying a function.1. for Loop
The for loop is used to execute a block of code a specific number of times.
Example
export default class ForLoopExample extends LightningElement {
    numbers = [];

    connectedCallback() {
        for (let i = 1; i <= 5; i++) {
            this.numbers.push(i);
        }
        console.log(this.numbers); // Output: [1, 2, 3, 4, 5]
    }
}
Output:
Console logs:
[1, 2, 3, 4, 5]2. while Loop
The while loop executes a block of code as long as a specified condition is true.
Example
export default class WhileLoopExample extends LightningElement {
    numbers = [];
    count = 1;

    connectedCallback() {
        while (this.count <= 5) {
            this.numbers.push(this.count);
            this.count++;
        }
        console.log(this.numbers); // Output: [1, 2, 3, 4, 5]
    }
}
Output:
Console logs:
[1, 2, 3, 4, 5]3. for...of Loop
The for...of loop iterates over iterable objects like arrays, strings, or maps.
Example
export default class ForOfLoopExample extends LightningElement {
    fruits = ['Apple', 'Banana', 'Cherry'];
    fruitList = [];

    connectedCallback() {
        for (const fruit of this.fruits) {
            this.fruitList.push(fruit);
        }
        console.log(this.fruitList); // Output: ['Apple', 'Banana', 'Cherry']
    }
}
Output:
Console logs:
['Apple', 'Banana', 'Cherry']a. map()
The map() method creates a new array by applying a function to each element in the original array.
Example
export default class MapExample extends LightningElement {
    numbers = [1, 2, 3, 4, 5];
    doubledNumbers = [];

    connectedCallback() {
        this.doubledNumbers = this.numbers.map(num => num * 2);
        console.log(this.doubledNumbers); // Output: [2, 4, 6, 8, 10]
    }
}
Output:
Console logs:
[2, 4, 6, 8, 10]b. filter()
The filter() method creates a new array with elements that pass a test.
Example
export default class FilterExample extends LightningElement {
    numbers = [1, 2, 3, 4, 5];
    evenNumbers = [];

    connectedCallback() {
        this.evenNumbers = this.numbers.filter(num => num % 2 === 0);
        console.log(this.evenNumbers); // Output: [2, 4]
    }
}
Output:
Console logs:
[2, 4]c. reduce()
The reduce() method reduces an array to a single value by applying a function.
Example
export default class ReduceExample extends LightningElement {
    numbers = [1, 2, 3, 4, 5];
    sum = 0;

    connectedCallback() {
        this.sum = this.numbers.reduce((total, num) => total + num, 0);
        console.log(this.sum); // Output: 15
    }
}
Output:
Console logs:
15Curious?
You can use loops to render dynamic lists in your component templates.
Example
export default class DynamicListExample extends LightningElement {
    fruits = ['Apple', 'Banana', 'Cherry'];
}
<template>
<template for:each={fruits} for:item="fruit">
<p key={fruit}>{fruit}</p>
</template>
</template>Output:
Renders:
Apple
Banana
CherryYou can use filter() to display only specific items in a list.
Example
export default class FilteredListExample extends LightningElement {
    fruits = ['Apple', 'Banana', 'Cherry'];
    filteredFruits = [];

    connectedCallback() {
        this.filteredFruits = this.fruits.filter(fruit => fruit.startsWith('B'));
    }
}
<template>
<template for:each={filteredFruits} for:item="fruit">
<p key={fruit}>{fruit}</p>
</template>
</template>Output:
Renders:
BananaYou can use reduce() to calculate totals, such as the sum of prices in a shopping cart.
Example
export default class ShoppingCartExample extends LightningElement {
    cart = [
        { name: 'Apple', price: 1.99 },
        { name: 'Banana', price: 0.99 },
        { name: 'Cherry', price: 2.99 }
    ];
    total = 0;

    connectedCallback() {
        this.total = this.cart.reduce((total, item) => total + item.price, 0);
    }
}
<template>
<p>Total: ${total.toFixed(2)}</p>
</template>Output:
Renders:
Total: $5.97You can use map() to transform data, such as formatting currency.
Example
export default class CurrencyFormatExample extends LightningElement {
    prices = [1.99, 0.99, 2.99];
    formattedPrices = [];

    connectedCallback() {
        this.formattedPrices = this.prices.map(price => `$${price.toFixed(2)}`);
    }
}
<template>
<template for:each={formattedPrices} for:item="price">
<p key={price}>{price}</p>
</template>
</template>Output:
Renders:
$1.99
$0.99
$2.99
Mind it!
Loops and iterations are essential for manipulating data and building dynamic Lightning Web Components. By mastering for, while, for...of, and array methods like map, filter, and reduce, you can efficiently process data, render dynamic lists, and perform complex calculations. These concepts will empower you to create powerful and maintainable LWC applications.

One short email when we publish something new — interview questions, Salesforce guides and career tips. No spam, unsubscribe in one click.
Understand LWC decorators (@api, @track, @wire) and lifecycle hooks with clear examples — what each does and when to use it in your components.
The JavaScript concepts to know before starting Lightning Web Components — variables, functions, objects, arrays, classes, modules and promises.

Lightning Web Components basics — component files, HTML templates, JavaScript class, decorators and data binding — explained for beginners.
Questions, corrections or your own experience — they all help the next reader.